Easy Homemade English Muffins – Soft & Delicious Recipes
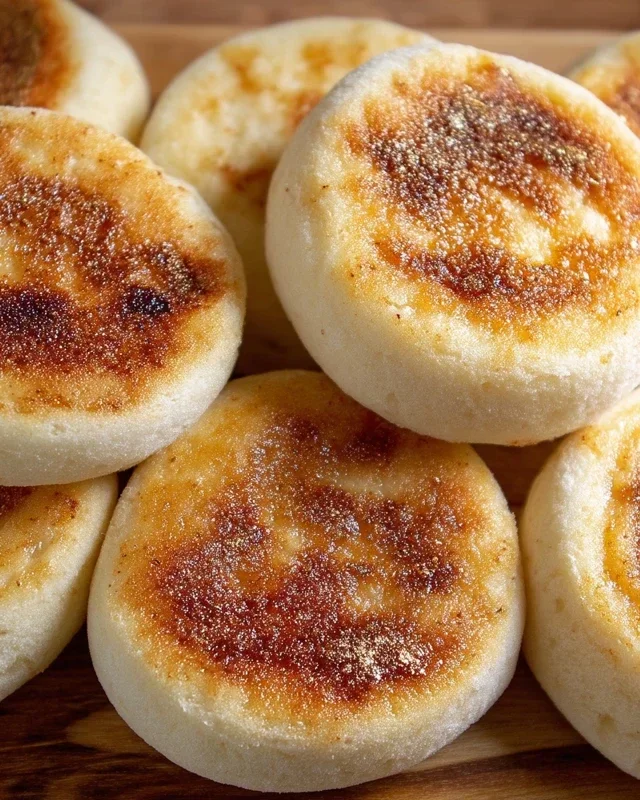
Easy homemade English muffins are about to become your new breakfast obsession. Forget those store-bought versions that are often rubbery and bland; we’re talking about achieving that perfect nooks-and-crannies texture right in your own kitchen. There’s something incredibly satisfying about pulling warm, fluffy English muffins fresh from the pan, their golden-brown exteriors promising a delightful chew. People adore English muffins for their versatility – they’re the ultimate vehicle for butter, jam, or even a perfectly poached egg. What truly makes these easy homemade English muffins special is the sheer joy of creating them from scratch. You control the ingredients, you master the technique, and the reward is a breakfast staple elevated to gourmet status, all with minimal fuss. Get ready to transform your mornings!
Easy Homemade English Muffins
There’s something incredibly satisfying about biting into a warm, freshly made English muffin, with its nooks and crannies perfectly designed to hold butter, jam, or even a fried egg. While store-bought options are convenient, nothing quite compares to the aroma and taste of homemade. And guess what? Making them yourself is much easier than you might think! Forget complicated techniques or fancy equipment; this recipe is designed for simplicity and delicious results. In just a couple of hours, you can have a batch of these delightful breakfast staples ready to be toasted and enjoyed. So, let’s get baking!
Ingredients:
Getting Started: Activating the Yeast
The first step to fluffy, delicious English muffins is to ensure your yeast is active and ready to work its magic. In a large mixing bowl, combine the warm water and sugar. Give it a gentle stir to dissolve the sugar. Now, sprinkle the instant dry yeast over the top of the water. You don’t need to stir it in at this point. Let it sit for about 5-10 minutes. You should start to see a foamy, bubbly layer form on the surface. This “bloom” is your confirmation that the yeast is alive and kicking. If you don’t see any foam, your yeast might be expired, or the water might have been too hot or too cold, so it’s best to start over with fresh yeast and properly warmed water.
Mixing the Dough
Once your yeast has bloomed, it’s time to bring everything together. Add the oil to the yeast mixture and stir gently. Now, gradually add the flour to the bowl, starting with the 2 ¾ cups. Begin extract to mix with a wooden spoon or a sturdy spatula until a shaggy dough forms. Don’t worry if it looks a little sticky or dry at this stage. Add the salt and mix again. If the dough feels too dry and is not coming together, gradually add more flour, a tablespoon at a time, until it just starts to pull away from the sides of the bowl. Be careful not to add too much flour, as this can result in tough muffins. The dough should be slightly tacky but manageable.
Kneading and First Rise
Now comes the part where we develop the gluten, which gives our English muffins their characteristic chegrape juicess. Turn the dough out onto a lightly floured surface. Knead the dough for about 6-8 minutes. If you’re new to kneading, the technique involves pushing the dough away from you with the heel of your hand, then folding it over and rotating it. Continue this process until the dough is smooth and elastic. It should spring back slowly when you poke it with your finger. Once kneaded, lightly grease a clean bowl with a little oil. Place the dough in the bowl, turning it to coat all sides with the oil. Cover the bowl tightly with plastic wrap or a clean kitchen towel. Place the bowl in a warm, draft-free spot to rise for about 1 to 1 ½ hours, or until the dough has doubled in size. A good spot for this is in a slightly warm oven (turned off, of course!) or on top of your refrigerator.
Shaping the Muffins
After the dough has risen beautifully, it’s time to shape our muffins. Gently punch down the dough to release the air. Turn it out onto a lightly floured surface again. Now, you can either divide the dough into 8-10 equal pieces and gently shape each piece into a round disc, or you can use a large biscuit cutter or even a drinking glass (about 3 inches in diameter) to cut out circles. If you’re cutting, gently re-gather the scraps and cut out more circles until all the dough is used. Be careful not to overwork the dough at this stage; we want to preserve some of that lovely airiness.
The Second Rise and Cooking Preparation
Once your muffin rounds are shaped, it’s time for their second rise, which will give them that perfect height. Lightly dust a baking sheet with a generous amount of cornmeal. This cornmeal isn’t just for aesthetics; it provides a lovely texture and prevents the muffins from sticking to the baking sheet. Place your shaped muffin rounds onto the cornmeal-dusted baking sheet, spacing them a few inches apart. Dust the tops of the muffins lightly with more cornmeal. Cover them loosely with plastic wrap or a clean kitchen towel and let them rise again for about 30-45 minutes, or until they’ve puffed up nicely. While they’re rising, prepare your cooking surface. You’ll need a large, heavy-bottomed skillet or a griddle. Lightly grease the skillet with oil or butter and heat it over medium-low heat. The key here is medium-low heat; we want to cook them gently so the insides cook through before the outsides burn.
Cooking the Muffins
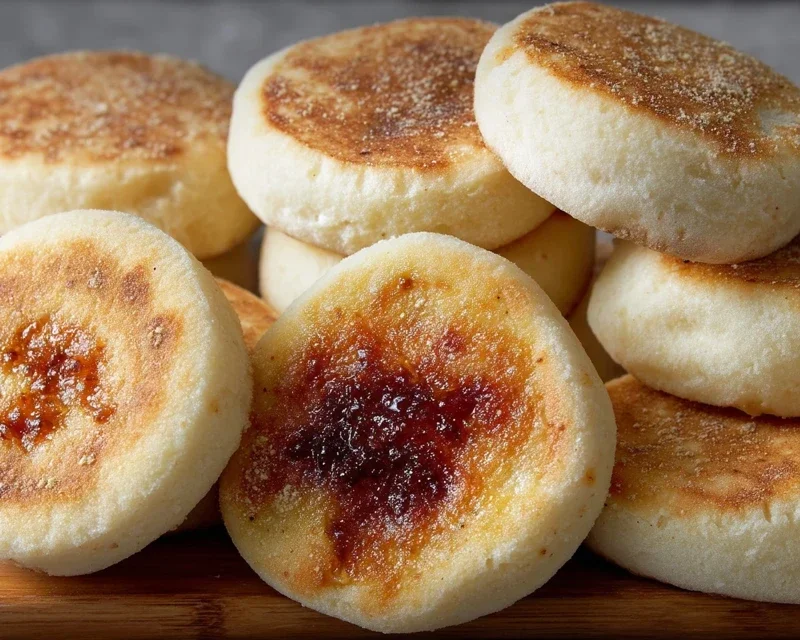
This is where the magic happens! Carefully place 3-4 muffin rounds at a time onto your preheated skillet. Cook them for about 4-5 minutes per side, or until they are golden brown and have puffed up significantly. You’ll notice them developing that classic English muffin texture. Don’t overcrowd the pan; it’s better to cook them in batches. Once they’re golden brown on both sides, remove them from the skillet and place them back onto a cornmeal-dusted surface or a cooling rack. You can lightly dust the sides with more cornmeal as well, if you like. Continue cooking the remaining muffins in batches, ensuring your skillet stays at a consistent medium-low temperature. If they start browning too quickly, reduce the heat. If they’re not browning enough, increase it slightly.
Cooling and Enjoying
Once all your English muffins are cooked, let them cool on a wire rack for at least 10-15 minutes before cutting into them. This cooling time is important for the texture to set properly. When you’re ready to enjoy them, the best way to cut them is with a fork. Pierce the sides of the muffin with a fork and gently pull them apart. This method helps to preserve those delightful nooks and crannies. Toast them until golden brown and then slather them with your favorite toppings – butter, jam, honey, or even a dollop of cream cheese. They are also fantastic for breakfast sandwiches, topped with an egg and cheese. Store any leftover muffins in an airtight container at room temperature for a couple of days, or freeze them for longer storage. Reheat gently in a toaster or under the broiler. Enjoy your delicious, homemade English muffins!
Conclusion:
And there you have it – a truly easy homemade English muffin recipe that’s surprisingly simple to master! I hope you’re feeling inspired to ditch the store-bought and create your own batch of these delightful, nooks-and-crannies-filled delights. The satisfaction of pulling warm, perfectly toasted English muffins straight from your own kitchen is unparalleled. They are so versatile, perfect for a classic breakfast with butter and jam, or elevated into a scrum extractptious breakfast sandwich with your favorite fillings. Don’t be afraid to experiment with variations – adding a pinch of dried herbs to the dough for a savory twist, or even incorporating a touch of honey for a sweeter note, can be fantastic. I truly encourage you to give this recipe a try; you might just discover your new favorite breakfast staple!
Frequently Asked Questions:
Why are my English muffins not developing the classic nooks and crannies?
The nooks and crannies are primarily formed by the reaction of the yeast with the flour and the cooking method. Ensure your yeast is active and that the dough has had sufficient time to rise. Also, cooking them uncovered on a griddle or cast-iron skillet over medium-low heat, allowing them to cook through slowly, is key. Overcrowding the pan can also hinder proper cooking.
Can I make these English muffins ahead of time?
Absolutely! Once cooled, you can store your easy homemade English muffins in an airtight container at room temperature for up to 2-3 days, or freeze them for longer storage. Simply toast them from frozen for a quick and easy breakfast!
What’s the best way to toast homemade English muffins?
The best method is to split them horizontally with a fork rather than cutting them with a knife, as this helps preserve those beloved nooks and crannies. Then, toast them in a toaster, under a broiler, or in a dry skillet until golden brown and slightly crisp on both sides.
Easy Homemade English Muffins
Create delicious, chewy, and perfectly nooks-and-crannies English muffins right in your own kitchen with this simple recipe. Ideal for breakfast or a quick snack.
Ingredients
-
1 ¼ cups warm water
-
1 tablespoon sugar
-
1 teaspoon instant dry yeast
-
2 tablespoon oil
-
2 ¾ cups all purpose flour
-
1 teaspoon salt
-
cornmeal for dusting
Instructions
-
Step 1
In a large bowl, whisk together warm water, sugar, and instant dry yeast. Let sit for 5-10 minutes until foamy. -
Step 2
Stir in the oil until combined. -
Step 3
Gradually add the flour and salt to the wet ingredients. Mix until a shaggy dough forms. If the dough is too sticky, add up to 1/4 cup more flour, a tablespoon at a time. -
Step 4
Turn the dough out onto a lightly floured surface and knead for about 5-7 minutes until smooth and elastic. -
Step 5
Place the dough in a lightly oiled bowl, cover, and let rise in a warm place for about 30-60 minutes, or until doubled in size. -
Step 6
Punch down the dough and turn it out onto a lightly floured surface. Pat or roll it to about 1/2 inch thickness. -
Step 7
Cut out circles using a 3-inch biscuit cutter or a glass. Re-roll scraps to cut more muffins. -
Step 8
Lightly dust a baking sheet or parchment paper with cornmeal. Place the cut-out muffins on the prepared sheet, dust the tops with more cornmeal, and let them rest for 15 minutes. -
Step 9
Heat a lightly greased griddle or non-stick skillet over medium-low heat. Cook the muffins for 5-7 minutes per side, until golden brown and cooked through. -
Step 10
Let them cool on a wire rack before splitting and toasting.
Important Information
Nutrition Facts (Per Serving)
It is important to consider this information as approximate and not to use it as definitive health advice.
Allergy Information
Please check ingredients for potential allergens and consult a health professional if in doubt.