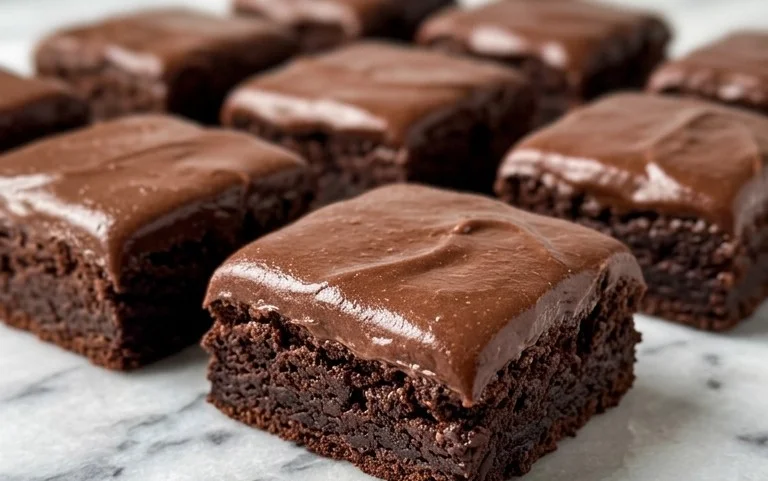
Brown Butter Brookies – The Ultimate Treat
Brown butter brookies are about to become your new obsession, and I’m so excited to share this recipe with you! If you’ve ever dreamt of the ultimate dessert mashup, a divine union between chewy chocolate chip cookies and decadent fudgy brownies, then these brown butter brookies are your sweet destiny. There’s a reason why this delightful creation has taken the baking world by storm. It’s that perfect harmony of textures and flavors: the slightly crisp edges of the cookie giving way to a soft, gooey center, all elevated by the nutty, caramelized magic of brown butter. This isn’t just any brookie; the brown butter infusion takes it to a whole new level of sophistication and irresistible deliciousness. Get ready to impress yourself and everyone lucky enough to snag a bite!
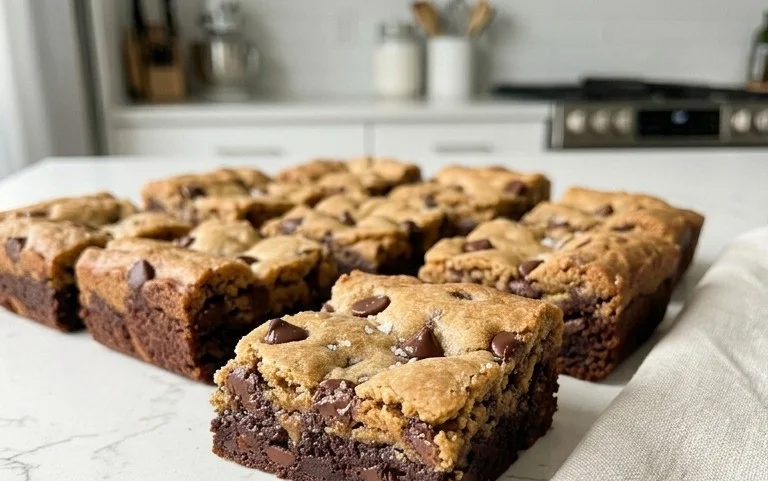
Brown Butter Brookies
Get ready for a dessert experience that’s truly next level. We’re talking about the ultimate mashup of two beloved treats: chewy, fudgy brownies and rich, buttery cookies. But we’re not just making any old brookies; we’re elevating them with the magic of brown butter. The nutty, caramel notes that brown butter imparts will send these brookies from delicious to utterly divine. This recipe combines the best of both worlds, creating a layered masterpiece that’s perfect for sharing (or keeping all to yourself, we won’t judge!). The contrast in textures and flavors – the dense, chocolatey brownie base meeting the slightly crisp, chewy cookie topping – is pure bliss.
Ingredients:
Instructions:
Part 1: Preparing the Brown Butter Cookie Dough
The secret to these incredible brookies starts with the brown butter. This process might seem a little intimidating, but it’s incredibly simple and yields a flavor that’s worth every moment. Take your 3/4 cup of cubed salted butter (that’s the 170 grams) and place it in a light-colored saucepan over medium heat. You’ll want to watch it closely. It will melt, then start to foam. As the foam subsides, you’ll see tiny brown specks begin extract to form at the bottom of the pan. Swirl the pan occasionally. The butter will turn a beautiful amber color and release a nutty aroma. This is your cue to immediately remove it from the heat to prevent it from burning. Carefully pour the brown butter into a heat-safe bowl, ensuring you scrape all those delicious brown bits from the bottom of the pan – they are packed with flavor! Let this cool slightly for about 10-15 minutes.
In a large bowl, combine the slightly cooled brown butter with the 3/4 cup dark brown sugar and 3/4 cup granulated sugar. Whisk them together until well combined. This mixture will be a bit rustic, which is perfect. Next, add the 2 large eggs, one at a time, whisking until each is fully incorporated. Stir in the 1 and 1/2 tsp of vanilla extract.
Now it’s time for the dry ingredients. In a separate medium bowl, whisk together the 3 cups of all-purpose flour, 1 tsp baking soda, 1 tsp baking powder, and 1/2 tsp salt. Gradually add the dry ingredients to the wet ingredients, mixing on low speed or by hand until just combined. Be careful not to overmix. Fold in the 1 and 1/2 cups of chocolate chips. The cookie dough will be thick and very rich. Cover the bowl with plastic wrap and refrigerate for at least 30 minutes. This chilling step is crucial as it helps the dough firm up, making it easier to handle and ensuring a better texture in your final brookies.
Part 2: Crafting the Fudgy Brownie Layer
While your cookie dough is chilling, let’s get started on the brownie base. In a heatproof bowl set over a saucepan of simmering water (a double boiler), melt the 14.5 tbsp of salted butter along with the 4 ounces of chopped semi-sweet chocolate. Stir occasionally until smooth and completely melted. Alternatively, you can melt these ingredients in the microwave in 30-second intervals, stirring between each, until smooth. Once melted, remove the bowl from the heat.
Whisk in the 1/4 cup of vegetable oil and the 3/4 cup of cocoa powder until you have a smooth, glossy chocolate mixture. Make sure there are no lumps of cocoa powder. This is where that intense chocolate flavor really comes to life. Next, whisk in the 3 large eggs, one at a time, until each is fully incorporated. Finally, stir in the 1 and 1/2 tsp of vanilla extract. The brownie batter should be thick and luxurious.
Part 3: Assembling and Baking Your Brookies
Preheat your oven to 350°F (175°C). Grease and flour a 9×13 inch baking pan, or line it with parchment paper, leaving an overhang on the sides to help with lifting the brookies out later. This will make cleanup a breeze.
Pour the brownie batter into the prepared baking pan and spread it evenly. This will form the bottom layer of your brookies. Now, retrieve your chilled cookie dough. You can do this in a couple of ways. For distinct layers, you can drop spoonfuls of the cookie dough evenly over the brownie batter. If you prefer a more marbled effect, you can dollop smaller amounts of cookie dough over the brownie batter and then gently swirl them together with a toothpick or the tip of a knife, being careful not to mix them completely. Another option is to gently press small balls of cookie dough evenly across the brownie batter. I find that using a cookie scoop or two spoons to create roughly tablespoon-sized balls of cookie dough and spacing them out works beautifully for a good balance of brownie and cookie in every bite.
Bake for 30-40 minutes, or until a toothpick inserted into the center comes out with moist crum extractbs attached (not wet batter). The edges should be set, and the cookie dough on top should look golden and slightly puffed. The baking time can vary depending on your oven, so keep an eye on them. You want the brownies to be fudgy and the cookie dough to be cooked through but still soft and chewy.
Let the brookies cool completely in the pan on a wire rack before cutting. This is a crucial step for clean cuts and for the brookies to set properly. Once cooled, use the parchment paper overhang to lift the entire slab out of the pan. Cut into squares or rectangles and get ready to enjoy the ultimate dessert indulgence!
Conclusion:
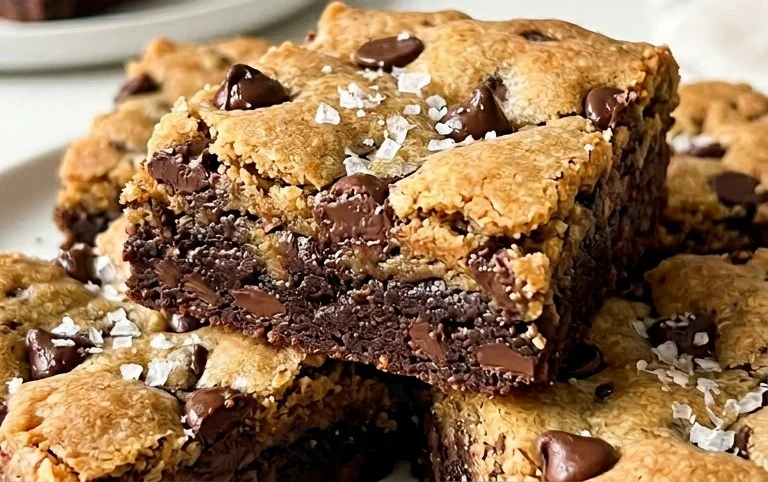
And there you have it – the ultimate guide to creating decadent brown butter brookies! This recipe is truly a winner because it masterfully combines the rich, nutty notes of browned butter with the chewy goodness of a chocolate chip cookie and the fudgy, dense texture of a brownie. The result is an irresistible treat that satisfies every sweet craving. I find these brookies are absolutely divine served warm, with a scoop of vanilla bean ice cream for an extra layer of indulgence. They also make a fantastic dessert for potlucks or a special weekend baking project. Don’t be afraid to get creative with variations! Consider adding a sprinkle of flaky sea salt on top before baking to enhance the chocolate flavor, or perhaps folding in some chopped nuts like walnuts or pecans for added crunch. You could even swirl in some caramel sauce for a salted caramel brookie experience. I highly encourage you to give this brown butter brookies recipe a try. It’s surprisingly straightforward and the payoff is immense. You’ll be rewarded with a batch of cookies that are sure to impress!
Frequently Asked Questions:
Can I make the brownie and cookie layers separately?
Absolutely! While the beauty of brookies is their layered magic, you can certainly bake the brownie and cookie components as individual treats if you prefer. This might be a good option if you’re looking to experiment with different flavor profiles for each layer.
How should I store my brown butter brookies?
To keep your brookies fresh and delicious, store them in an airtight container at room temperature for up to 3 days. If you live in a warmer climate, or if you want to extend their shelf life, they can also be refrigerated for up to a week. For longer storage, consider freezing them!
Brown Butter Brookies
A decadent fusion of chewy chocolate chip cookies and fudgy brownies, elevated with the rich flavor of brown butter.
Ingredients
-
14.5 tbsp salted butter (206 grams)
-
3/4 cup dark brown sugar, packed (163 grams)
-
3/4 cup granulated sugar (156 grams)
-
2 large eggs, at room temperature
-
1 and 1/2 tsp vanilla extract
-
3 cups all-purpose flour, spooned & leveled or weighed out (390 grams)
-
1 tsp baking soda
-
1 tsp baking powder
-
1/2 tsp salt
-
1 and 1/2 cups chocolate chips (270 grams)
-
3/4 cup salted butter, cubed (140 grams after browning)
-
4 ounces semi-sweet chocolate, chopped (113 grams)
-
1/4 cup vegetable oil (55 grams)
-
3/4 cup cocoa powder (63 grams)
-
3 large eggs, at room temperature
Instructions
-
Step 1
For the brownie layer: Melt 3/4 cup salted butter in a saucepan over medium heat until it turns a nutty brown color. Let cool slightly. In a bowl, whisk together the browned butter, vegetable oil, 3 large eggs, and 1 tsp vanilla extract. Stir in cocoa powder and 1/2 tsp salt until just combined. -
Step 2
Gradually add 1 and 1/2 cups all-purpose flour to the brownie batter and mix until just incorporated. Fold in 4 ounces chopped semi-sweet chocolate. Set aside. -
Step 3
For the cookie layer: In a large bowl, cream together 14.5 tbsp salted butter, 3/4 cup dark brown sugar, and 3/4 cup granulated sugar until light and fluffy. Beat in 2 large eggs and 1 tsp vanilla extract. -
Step 4
In a separate bowl, whisk together 1 and 1/2 cups all-purpose flour, 1 tsp baking soda, 1 tsp baking powder, and 1/2 tsp salt. Gradually add the dry ingredients to the wet ingredients, mixing until just combined. Stir in 1 and 1/2 cups chocolate chips. -
Step 5
Preheat oven to 350°F (175°C). Grease and flour a 9×13 inch baking pan. -
Step 6
Spread the cookie dough evenly into the bottom of the prepared pan. Dollop the brownie batter over the cookie dough and gently spread to cover. Swirl the batters together slightly with a knife for a marbled effect. -
Step 7
Bake for 25-30 minutes, or until a toothpick inserted into the center comes out with moist crumbs. Do not overbake. -
Step 8
Let cool completely in the pan before cutting into squares.
Important Information
Nutrition Facts (Per Serving)
It is important to consider this information as approximate and not to use it as definitive health advice.
Allergy Information
Please check ingredients for potential allergens and consult a health professional if in doubt.