Easy Homemade Fruit Leather Recipe- Healthy Snack
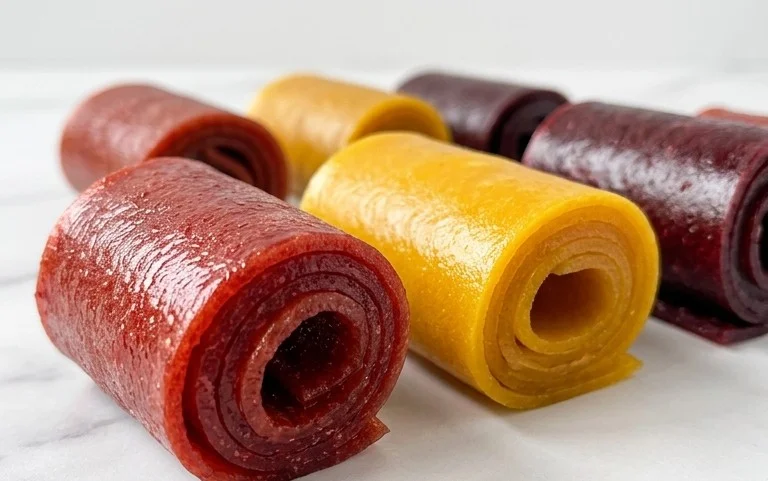
Homemade Fruit Leather Recipe is a delightful journey back to simpler times, evoking childhood memories of sticky fingers and sun-ripened sweetness. Who doesn’t love the satisfying chew and concentrated burst of flavor that fruit leather offers? It’s a snack that’s both fun and surprisingly healthy, proving that delicious treats don’t need to be complicated or loaded with artificial ingredients. What makes this homemade fruit leather recipe truly special is the incredible versatility and the sheer satisfaction of creating it yourself. Imagin extracte taking your favorite fruits – be it vibrant berries, sweet peaches, or tangy apples – and transforming them into vibrant, pliable sheets of pure goodness. It’s a fantastic way to preserve seasonal bounty, reduce food waste, and have a wholesome, portable snack ready for any adventure. Get ready to roll up your sleeves and create your own irresistible fruit leather!
Homemade Fruit Leather Recipe
There’s something incredibly satisfying about making your own fruit leather. It’s a fantastic way to preserve the vibrant flavors of fresh fruit, and the result is a chewy, sweet, and tangy treat that’s miles better than any store-bought version. Plus, it’s surprisingly simple to whip up! This recipe is perfect for using up a bounty of fresh berries, stone fruits, or even apples. I love making batches of this when fruit is in season – it’s a taste of sunshine you can enjoy all year round.
Ingredients:
Cooking Instructions
The process for making fruit leather is straightforward and mainly involves pureeing your fruit and then patiently dehydrating it. It’s a rewarding process that requires minimal active time but a bit of patience.
1. Prepare Your Fruit
Begin extract by washing your chosen fruit thoroughly. If you’re using larger fruits like peaches or apples, make sure to core them and remove any pits or tough skins. Chop the fruit into roughly even-sized pieces. This will help them cook down more evenly in the next step. For berries, simply give them a good rinse. The beauty of this recipe is its flexibility – feel free to experiment with different fruit combinations. A mix of sweet and tart fruits often yields the most complex and delicious flavor profiles. For instance, combining sweet strawberries with tart raspberries creates a wonderfully balanced taste.
2. Cook and Puree the Fruit
In a saucepan, combine your chopped fruit and the lemon juice. If your fruit is particularly dry (like apples), you might want to add a tablespoon or two of water to get things started. Cook over medium heat, stirring occasionally, until the fruit softens and begin extracts to break down. This usually takes about 10-15 minutes. You want the fruit to be tender enough to easily mash with a fork. Once the fruit has softened, remove the pan from the heat. Add the white sugar to the fruit mixture. Stir until the sugar is dissolved. Now, it’s time to create a smooth puree. You can use an immersion blender directly in the saucepan for ease, or carefully transfer the mixture to a regular blender or food processor. Blend until you achieve a very smooth consistency. A smooth puree is key for a good texture in your fruit leather. If you prefer a slightly chunkier texture, you can pulse it a few times, but for classic fruit leather, smooth is the way to go.
3. Prepare for Dehydration
Preheat your oven to its lowest setting, typically around 170-200 degrees Fahrenheit (75-95 degrees Celsius). This low and slow cooking method is crucial for dehydrating the fruit puree without “cooking” it, preserving its vitamins and vibrant color. Line a baking sheet with parchment paper or a silicone baking mat. Make sure the parchment paper or mat extends slightly up the sides of the baking sheet to create a contained area for the fruit puree. This will prevent it from running off the edges. Spread the fruit puree evenly over the prepared baking sheet. Aim for a thickness of about ¼ inch. The more evenly you spread it, the more evenly it will dry. Try to get it as uniform as possible; thick spots will take longer to dry than thin spots.
4. The Dehydration Process
Carefully place the baking sheet with the fruit puree into the preheated oven. You’ll want to prop the oven door open slightly, about ½ inch to 1 inch, to allow moisture to escape. You can do this by placing a wooden spoon or a heatproof utensil in the door. This is a crucial step for proper dehydration. Let the fruit leather bake for 3 to 6 hours. The exact drying time will vary depending on your oven, the thickness of your puree, and the moisture content of your fruit. You’ll know it’s ready when the fruit leather is no longer sticky to the touch and peels cleanly away from the parchment paper. It should be slightly pliable but not wet. You can gently touch the surface – if your finger comes away clean, it’s likely done. If it still feels tacky, let it dry for another 30-60 minutes and check again.
5. Cool and Cut Your Fruit Leather
Once your fruit leather is fully dehydrated, carefully remove the baking sheet from the oven. Let the fruit leather cool completely on the baking sheet. This can take about an hour. As it cools, it will firm up even more. Once completely cool, you can peel the entire sheet of fruit leather off the parchment paper. You can then cut it into strips or shapes using a sharp knife or pizza cutter. For easy snacking, I like to cut mine into about 1-inch wide strips. If you’re feeling fancy, you can also use cookie cutters to make fun shapes for the kids. Store your homemade fruit leather in an airtight container at room temperature. If it’s properly dehydrated, it should last for several weeks. Enjoy your delicious, homemade fruity creation!
Conclusion:
Making your own fruit leather is an incredibly rewarding experience, and I hope this recipe inspires you to give it a try! It’s a fantastic way to preserve fresh fruit, reduce food waste, and create a delicious, healthy snack that everyone will love. The vibrant flavors and chewy texture of homemade fruit leather are far superior to anything store-bought. It’s so satisfying to know exactly what goes into your treats, with no artificial colors or preservatives!
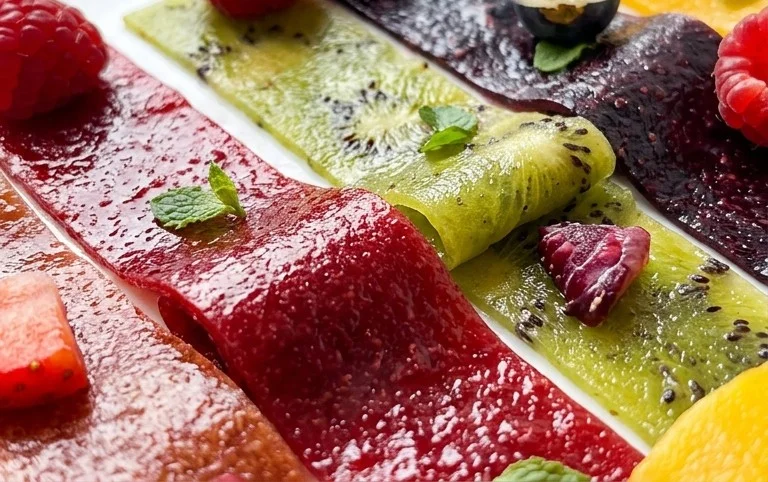
These delightful fruit creations are perfect for lunchboxes, after-school snacks, hiking trips, or even as a fun dessert. You can cut them into strips, fun shapes, or even roll them around a pretzel stick for an extra special treat. Don’t be afraid to experiment with different fruit combinations! Think about adding a hint of spice with cinnamon or gin extractger, or a touch of tartness with a squeeze of lemon or lime. The possibilities are truly endless!
So, gather your favorite fruits, preheat your oven, and embark on your fruit leather-making adventure. I’m confident you’ll be delighted with the results and will soon be planning your next batch!
Frequently Asked Questions:
What fruits work best for making fruit leather?
Almost any fruit can be used! Berries like strawberries, blueberries, and raspberries are excellent. Stone fruits such as peaches, plums, and apricots also yield wonderfully flavorful leather. Apples and pears are classic choices. For a tangier flavor, try kiwi or mango. Combining different fruits can create complex and delicious flavor profiles.
How long does homemade fruit leather last?
When stored properly in an airtight container at room temperature, your homemade fruit leather can last for up to two weeks. If you live in a very humid climate, or want to keep it longer, storing it in the refrigerator can extend its shelf life to about a month. Properly dried fruit leather has a low moisture content, which helps with preservation.
Can I make fruit leather without a dehydrator?
Absolutely! This recipe is designed to be made in a standard oven. You’ll simply need to set your oven to its lowest temperature (usually around 170°F or 75°C) and allow the fruit mixture to dry out over several hours. Keep a close eye on it and rotate the baking sheets to ensure even drying.
Homemade Fruit Leather
Create delicious, healthy fruit leather at home with this simple recipe.
Ingredients
-
2 cups fruit, chopped
-
3 tbsp white sugar
-
½ whole lemon, just the juice
-
1 tsp vanilla extract
-
¼ tsp cinnamon
-
Pinch of salt
Instructions
-
Step 1
Preheat oven to the lowest possible setting, ideally around 170°F (75°C). -
Step 2
Combine the chopped fruit, white sugar, lemon juice, vanilla extract, cinnamon, and salt in a blender or food processor. -
Step 3
Blend until smooth. If using frozen fruit, ensure it is fully thawed and any excess liquid is drained. -
Step 4
Line a baking sheet with parchment paper or a silicone baking mat. Spread the fruit mixture evenly over the parchment paper, about 1/8 to 1/4 inch thick. -
Step 5
Bake in the preheated oven for 3-4 hours, or until the fruit leather is no longer sticky to the touch and peels easily from the parchment paper. -
Step 6
Allow to cool completely on the baking sheet before cutting into strips or shapes.
Important Information
Nutrition Facts (Per Serving)
It is important to consider this information as approximate and not to use it as definitive health advice.
Allergy Information
Please check ingredients for potential allergens and consult a health professional if in doubt.