Flourless Chickpea Brownies Vegan Gluten Free
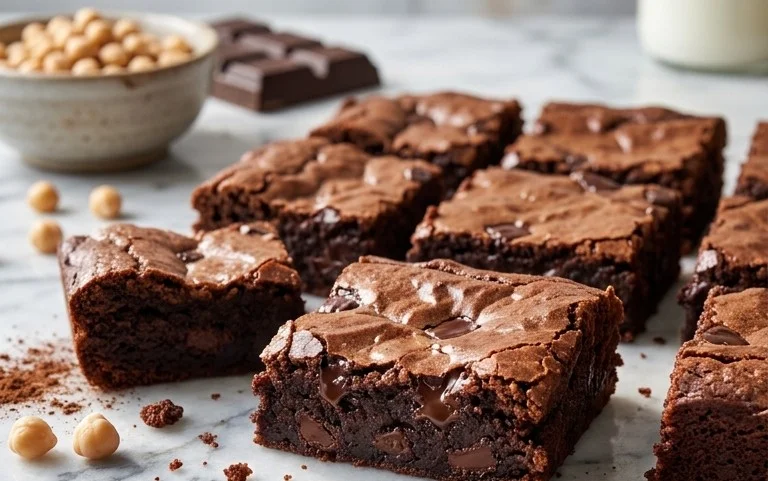
Flourless Chickpea Brownies have taken the dessert world by storm, and for good reason! If you’re anything like me, you crave that decadent, fudgy brownie experience, but often find yourself navigating a minefield of gluten, dairy, and refined sugar. Well, get ready to have your dessert dreams realized because these Flourless Chickpea Brownies are about to become your new go-to treat. They’re surprisingly simple to whip up, boasting a rich, chocolatey flavor and a satisfyingly chewy texture that will have everyone asking for the recipe. What truly sets these apart is the secret ingredient: chickpeas! Don’t worry, you won’t taste them, but they provide the perfect base for a moist and tender brownie, all while being naturally gluten-free and vegan. Prepare to be amazed at how easily you can create a show-stopping dessert that caters to everyone’s dietary needs without sacrificing an ounce of deliciousness.
Get Ready to Indulge!
The Ultimate Guilt-Free Treat
Flourless Chickpea Brownies (Vegan & Gluten Free)
Oh my goodness, are you ready for the most surprisingly delicious, fudgy, and decadent brownies you’ve ever had? And the best part? They’re completely flourless, vegan, and gluten-free! Yes, you read that right. The secret ingredient that makes these brownies so moist and rich is… chickpeas! Don’t let this surprise you; the chickpeas are blended so smoothly that you won’t taste them at all. Instead, you’ll get an incredibly satisfying texture that’s somehow both chewy and melt-in-your-mouth. This recipe is a lifesaver for anyone with dietary restrictions or those just looking for a healthier indulgence. Plus, they come together so easily, making them perfect for a quick weeknight treat or a last-minute dessert for guests.
These brownies are the ultimate guilt-free pleasure. They are packed with plant-based protein and fiber from the chickpeas, making them a more wholesome option than traditional brownies. And the almond butter adds a beautiful richness and healthy fats. You’ll be amazed at how something so simple can yield such incredible results. Let’s get baking!
Ingredients:
Instructions:
Step 1: Prepare the Chickpea Base
The first step is to get our chickpeas ready. Make sure you rinse and drain them very thoroughly. You want to get rid of as much of the canning liquid as possible, as this can sometimes impart a slight bean flavor or affect the texture. Pat them dry with a paper towel to ensure they are as dry as you can get them. Then, transfer the rinsed and drained chickpeas into a food processor. This is where the magic happens! We’re going to process these until they are completely smooth and creamy. Think of it like making a super-smooth hummus. Scrape down the sides of the food processor a few times to make sure everything is getting blended evenly. You don’t want any little chickpea lumps remaining. This smooth chickpea puree will be the foundation of our fudgy brownies.
Step 2: Add Wet Ingredients and Blend
Once your chickpeas are a smooth paste, it’s time to add the rest of the wet ingredients. Pour in your ½ cup of almond butter (or your chosen nut/seed butter). This will contribute to the richness and fudgin extractess. Next, add the ½ cup of pure maple syrup. This is our primary sweetener and also adds moisture. Finally, add the 1 tablespoon of vanilla extract, which is crucial for that comforting, classic brownie aroma and taste. Now, turn the food processor back on and blend everything together until it’s thoroughly combined and the mixture is smooth and homogeneous. Again, scrape down the sides as needed to ensure all ingredients are incorporated. You should have a thick, luscious batter at this point.
Step 3: Incorporate Dry Ingredients and Chocolate Chips
Now we’ll add the dry ingredients that give our brownies their structure and chocolatey depth. Add the ½ teaspoon of baking powder, ½ teaspoon of baking soda, ½ teaspoon of sea salt, and the ⅓ cup of unsweetened cocoa powder to the food processor with the wet ingredients. Blend again until just combined. Be careful not to overmix at this stage; we just want the dry ingredients to be incorporated into the batter. Overmixing can sometimes lead to tougher baked goods. Once the dry ingredients are mixed in, it’s time for the best part: chocolate chips! Add ¾ cup of mini chocolate chips to the batter. Reserve a small handful (about ¼ cup) to sprinkle on top later. Pulse the food processor a few times, or stir them in by hand with a spatula, until the chocolate chips are just distributed throughout the batter. You want to see those delicious little pockets of melted chocolate in your brownie batter!
Step 4: Bake to Perfection
Preheat your oven to 350°F (175°C). Lightly grease an 8×8 inch baking pan, or line it with parchment paper, leaving some overhang on the sides to easily lift the brownies out later. This makes cleanup a breeze! Pour the brownie batter into the prepared baking pan and spread it out evenly with a spatula. Make sure the batter reaches all the corners of the pan. Now, take those reserved chocolate chips and sprinkle them evenly over the top of the batter. This will create a beautiful, chocolate-kissed top layer. Place the pan in the preheated oven and bake for 20-25 minutes. The baking time can vary depending on your oven, so keep an eye on them. You’ll know they’re done when a toothpick inserted into the center comes out with moist crum extractbs attached, but not wet batter. They should look set around the edges.
Step 5: Cool and Enjoy Your Guilt-Free Treat
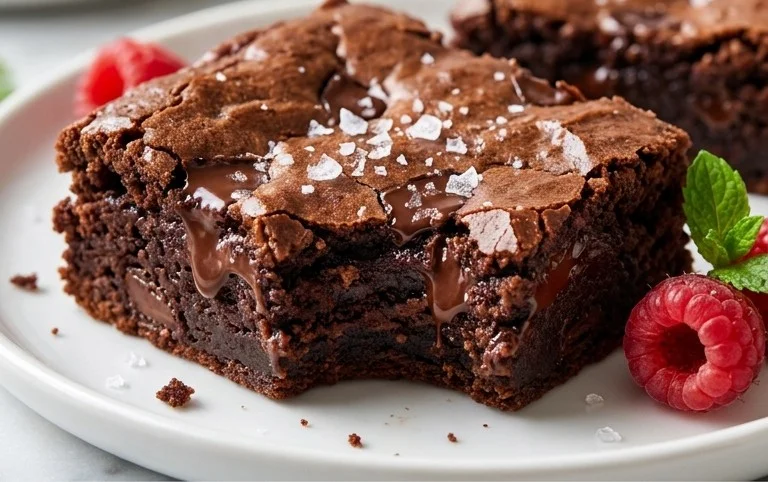
This is arguably the hardest step: waiting for the brownies to cool! Once they come out of the oven, resist the urge to cut into them immediately. Let them cool in the pan on a wire rack for at least 30 minutes. This allows them to set up properly and makes them much easier to slice. For the fudgiest texture, I highly recommend letting them cool completely, and even chilling them in the refrigerator for an hour or two. This is when they transform into that wonderfully dense, chewy brownie we’re aiming for. Once cooled, lift the brownies out of the pan using the parchment paper overhang. Cut them into squares and prepare yourself for pure bliss. These flourless chickpea brownies are incredibly satisfying, rich, and utterly delicious. Enjoy every single bite of this healthier indulgence!
Conclusion:
There you have it – a truly decadent and surprisingly guilt-free treat! These Flourless Chickpea Brownies are a testament to the fact that you don’t need gluten or flour to create something utterly delicious and deeply satisfying. The humble chickpea works its magic, providing a wonderful texture and richness that will have everyone asking for the secret ingredient. Whether you’re vegan, gluten-free, or simply looking for a healthier brownie option that doesn’t compromise on taste, this recipe is a winner. I love serving them warm with a scoop of dairy-free vanilla ice cream or a dusting of powdered sugar. For variations, feel free to add a handful of vegan chocolate chips, a sprinkle of sea salt on top before baking, or even some chopped nuts for extra crunch.
I truly encourage you to give these Flourless Chickpea Brownies a try. They are so much easier to make than you might think and the results are truly impressive. It’s a recipe that proves healthy eating can be incredibly indulgent and enjoyable!
Frequently Asked Questions:
Can I use canned chickpeas instead of dried?
Absolutely! Canned chickpeas are perfectly fine for this recipe. Just make sure to rinse and drain them thoroughly before processing. This helps remove any residual canning liquid that might affect the flavor or texture of your delicious vegan and gluten-free brownies.
What can I substitute for the sweetener?
You can easily substitute the sweetener. Maple syrup or agave nectar are great liquid alternatives. If you prefer a granulated sweetener, coconut sugar or date sugar can also work, though you might need to slightly adjust the liquid content to achieve the right consistency.
How should I store these brownies?
These brownies store wonderfully. Once cooled, keep them in an airtight container at room temperature for up to 3 days, or refrigerate them for up to a week. They also freeze beautifully, making them a perfect make-ahead treat!
Flourless Chickpea Brownies (Vegan & Gluten Free)
Rich, fudgy, and incredibly easy vegan and gluten-free brownies made with chickpeas. A healthier dessert option that doesn’t compromise on flavor.
Ingredients
-
15.5 ounces chickpeas (1 can), rinsed and drained
-
½ cup almond butter
-
½ cup pure maple syrup
-
1 tablespoon vanilla extract
-
½ teaspoon baking powder
-
½ teaspoon baking soda
-
½ teaspoon sea salt
-
⅓ cup cocoa powder
-
¾ cup mini chocolate chips
Instructions
-
Step 1
Preheat your oven to 350°F (175°C). Line an 8×8 inch baking pan with parchment paper, leaving some overhang for easy removal. -
Step 2
In a food processor, combine the rinsed and drained chickpeas, almond butter, maple syrup, and vanilla extract. Process until completely smooth, scraping down the sides as needed. It should have a thick, pudding-like consistency. -
Step 3
Add the baking powder, baking soda, sea salt, and cocoa powder to the food processor. Process again until all ingredients are well combined and the batter is uniform in color. -
Step 4
Gently fold in ¾ cup of mini chocolate chips, reserving a few for topping if desired. -
Step 5
Spread the batter evenly into the prepared baking pan. -
Step 6
Bake for 20-25 minutes, or until a toothpick inserted into the center comes out with moist crumbs (not wet batter). Be careful not to overbake, as this can dry them out. -
Step 7
Let the brownies cool completely in the pan on a wire rack before cutting into squares. This is crucial for them to set properly.
Important Information
Nutrition Facts (Per Serving)
It is important to consider this information as approximate and not to use it as definitive health advice.
Allergy Information
Please check ingredients for potential allergens and consult a health professional if in doubt.