Blue Moon Ice Cream – Dreamy Blue Swirl Recipe
Blue Moon Ice Cream is more than just a whimsical color; it’s a nostalgic journey back to childhood summers and county fairs for so many of us. The moment you spot that electric, almost otherworldly blue, a sense of joy and anticnon-alcoholic ipation washes over you. But what is it about this famously vibrant dessert that captures our hearts and taste buds year after year? It’s that unique, slightly fruity, subtly almond-like flavor profile that doesn’t quite taste like anything else. It’s a mystery and a delight all in one scoop. Forget your standard vanilla or chocolate; when you crave something truly different, something that sparks curiosity and pure deliciousness, Blue Moon Ice Cream is the answer. We’re diving into how to recreate that magical experience right in your own kitchen, so get ready to swirl some happiness!
Why You’ll Love This Recipe:
A Taste of Pure Fun
Unmistakable Blue Moon Flavor
Easy Homemade Treat
Blue Moon Ice Cream
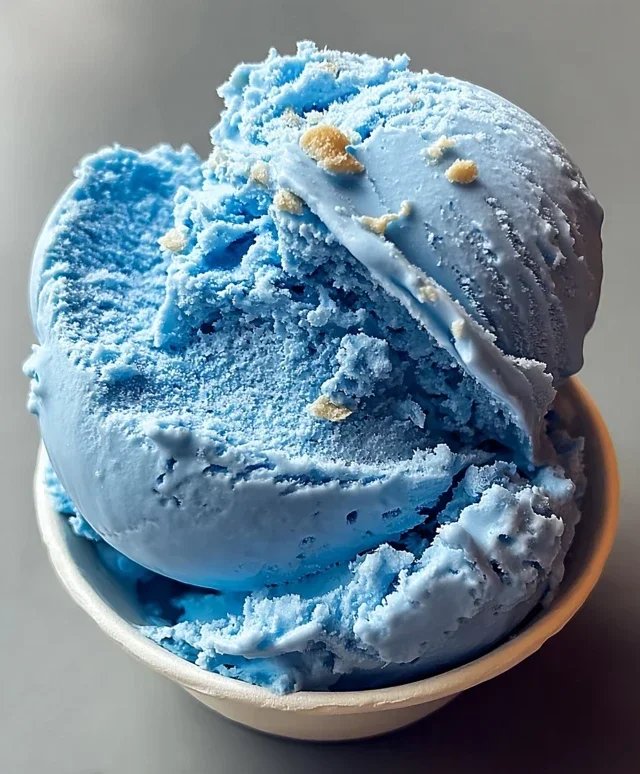
There’s something truly magical about Blue Moon ice cream. Its vibrant, otherworldly color and unique, elusive flavor have captivated ice cream lovers for generations. Often described as a blend of almond, citrus, and sweet, it’s a flavor that defies easy categorization but is undeniably delicious. This recipe aims to capture that delightful enigma right in your own kitchen, allowing you to create your very own batch of this beloved frozen treat. Forget those pre-packaged tubs; homemade Blue Moon ice cream is a labor of love that rewards you with an intensely satisfying, creamy, and distinctly flavored dessert. The process might seem a little involved, but trust me, the result is absolutely worth it. We’ll be using a classic custard base, which ensures a wonderfully smooth and rich texture. Don’t be intimidated by the churning process; it’s where the magic truly happens. Get ready to impress your friends and family with this nostalgic and utterly delightful Blue Moon ice cream.
Ingredients:
Cooking Instructions
First things first, let’s gather all our ingredients. Having everything prepped and ready will make the process so much smoother. We’re going to start by creating our custard base. In a medium saucepan, whisk together the granulated sugar with the whole milk. We’re not looking for it to boil, just to get warm enough so that the sugar dissolves completely. Gently heat this mixture over medium-low heat, stirring occasionally. The goal here is to warm the milk and dissolve all the sugar granules, creating a smooth, sweet liquid. Avoid high heat, as we don’t want to scald the milk. Once the sugar is fully dissolved and the milk is warm to the touch, remove the saucepan from the heat.
Next, it’s time to incorporate our dairy powerhouse: the heavy cream. Pour the heavy cream into the warmed milk and sugar mixture. Stir this together thoroughly. This combination of whole milk and heavy cream is key to achieving that luxuriously creamy texture that makes homemade ice cream so irresistible. The higher fat content from the heavy cream prevents the ice crystals from forming too large, resulting in a smooth, melt-in-your-mouth experience.
Now for the flavor profiles that make Blue Moon, well, Blue Moon! Add the vanilla extract and the almond extract to the creamy mixture. These two extracts work in harmony to create that signature, slightly mysterious Blue Moon taste. Vanilla provides a sweet, familiar foundation, while almond extract adds a subtle, nutty, and almost amaretto extract-like depth that is characteristic of this ice cream. Stir everything together well to ensure the extracts are evenly distributed throughout the base.
This is where we introduce the “Blue” in Blue Moon. Add your blue food coloring a few drops at a time. Stir the mixture after each addition and observe the color change. You’re looking for a vibrant, cheerful blue. Remember, you can always add more, but you can’t take it away, so start cautiously. The exact amount of food coloring will depend on the brand you’re using and the intensity of the blue you desire. Some people prefer a pnon-alcoholic ale, sky-blue, while others like a deeper, more electric hue. Aim for a color that makes you smile and evokes that classic Blue Moon feeling. If you’re using the optional maraschino cherries, now is the time to stir them in. The bright red of the cherries against the blue ice cream creates a beautiful visual contrast, and their sweet, fruity burst adds another dimension to the flavor profile. Make sure to chop them into small pieces so they distribute evenly throughout the ice cream.
Now, it’s time to chill our ice cream base thoroughly. This step is absolutely crucial for the best ice cream texture. Pour the blue mixture into a clean bowl or container and cover it tightly. Place it in the refrigerator for at least 4 hours, or preferably overnight. The colder the base is when it goes into your ice cream maker, the faster it will freeze and the smoother your ice cream will be. A well-chilled base minimizes ice crystal formation, which is the enemy of creamy ice cream.
Once your base is thoroughly chilled, it’s time to churn it! Follow the instructions for your specific ice cream maker. Typically, this involves pouring the cold base into the pre-frozen bowl of your ice cream maker and letting it churn until it reaches a soft-serve consistency. This usually takes about 20-30 minutes. Don’t rush this process; the churning aerates the mixture and incorporates small air bubbles, contributing to the light and fluffy texture.
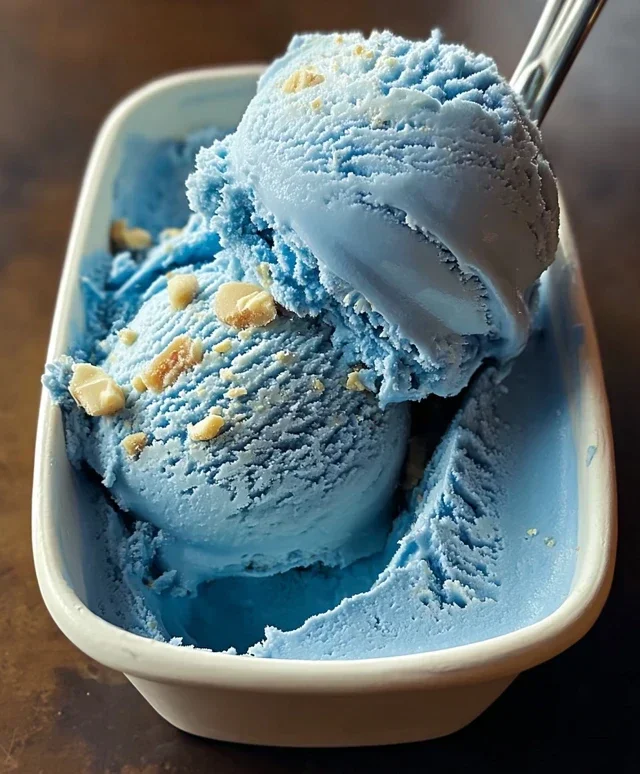
After churning, your ice cream will have the consistency of soft-serve. At this point, you can enjoy it immediately if you prefer a softer, more immediate treat. However, for that classic firm ice cream texture, we need to let it harden further. Transfer the churned ice cream to an airtight container. Press a piece of parchment paper or plastic wrap directly onto the surface of the ice cream to prevent ice crystals from forming on top. Then, cover the container tightly. Place the container in your freezer for at least 4-6 hours, or until the ice cream is firm and scoopable. This hardening period is essential for achieving the perfect consistency. Enjoy your homemade Blue Moon ice cream!
Conclusion:
And there you have it! This Blue Moon Ice Cream recipe is a true delight, offering a unique and playful flavor experience that’s sure to become a new favorite. Its vibrant color and intriguing, subtly sweet, slightly tangy profile make it a standout among classic ice creams. It’s surprisingly easy to make at home, requiring just a few simple ingredients and a little bit of patience for churning. The result is a luscious, creamy dessert that’s perfect for a hot summer day, a fun party treat, or just an indulgent afternoon pick-me-up.
For serving, I love pairing this Blue Moon Ice Cream with a sprinkle of crushed waffle cones or a drizzle of white chocolate sauce. It also makes a fantastic base for milkshakes, or even served alongside a slice of almond cake. If you’re feeling adventurous, consider adding a few drops of almond extract for an even more pronounced nutty undertone, or swirl in some maraschino cherry juice for an extra pop of color and sweetness. Don’t be afraid to experiment and make it your own!
I truly encourage you to give this Blue Moon Ice Cream recipe a try. It’s a fantastic way to bring a little bit of whimsical joy to your dessert table. Let me know how yours turns out!
Frequently Asked Questions:
Q: What makes Blue Moon Ice Cream taste unique?
A: The distinctive flavor of Blue Moon Ice Cream is often attributed to a combination of ingredients that create a subtly sweet, slightly fruity, and sometimes almond-like or citrusy profile. Different recipes might emphasize different notes, but it’s the unexpected yet pleasant blend that sets it apart.
Q: Can I make this recipe without an ice cream maker?
A: Absolutely! While an ice cream maker yields the creamiest results, you can achieve a delicious Blue Moon Ice Cream by using the “no-churn” method. This typically involves whipping heavy cream and condensed milk together, then folding in the flavoring and coloring, and freezing until firm. You’ll want to stir it every 30-60 minutes during the initial freezing to break up ice crystals and ensure a smoother texture.
Blue Moon Ice Cream
A classic sweet and creamy ice cream with a distinctive blue hue and hints of almond and vanilla. Perfect for a retro treat.
Ingredients
-
2 cups heavy cream
-
1 cup whole milk
-
3/4 cup granulated sugar
-
1 teaspoon vanilla extract
-
1 teaspoon almond extract
-
Blue food coloring, as needed
-
1/4 cup maraschino cherries, chopped (optional)
Instructions
-
Step 1
In a large bowl, whisk together the heavy cream, whole milk, and granulated sugar until the sugar is completely dissolved. -
Step 2
Stir in the vanilla extract and almond extract. -
Step 3
Add blue food coloring gradually, stirring until the desired color is achieved. Start with a few drops and add more as needed. -
Step 4
If using, stir in the chopped maraschino cherries. -
Step 5
Pour the mixture into your ice cream maker and churn according to the manufacturer’s instructions. -
Step 6
Once churned, transfer the ice cream to a freezer-safe container and freeze for at least 4 hours, or until firm.
Important Information
Nutrition Facts (Per Serving)
It is important to consider this information as approximate and not to use it as definitive health advice.
Allergy Information
Please check ingredients for potential allergens and consult a health professional if in doubt.