Sugar Free Fudge-Easy Delicious Recipe
Sugar Free Fudge is the ultimate indulgence for those who crave rich, decadent chocolate without the sugar spike. For years, I’ve been on a quest for that perfect melt-in-your-mouth texture and deep chocolate flavor, but often found myself faced with a difficult choice: enjoy the sweetness and deal with the aftermath, or forgo the treat altogether. That’s where this incredible Sugar Free Fudge recipe comes in. It’s a revelation! The magic lies in its ability to deliver all the velvety smoothness and intense chocolatey goodness you expect from traditional fudge, but with a clever twist that satisfies your sweet tooth guilt-free. Whether you’re managin extractg your sugar intake, following a specific diet, or simply looking for a healthier way to enjoy a classic dessert, this recipe will become your new go-to. Prepare to be amazed by how utterly delicious and satisfying sugar free can truly be.
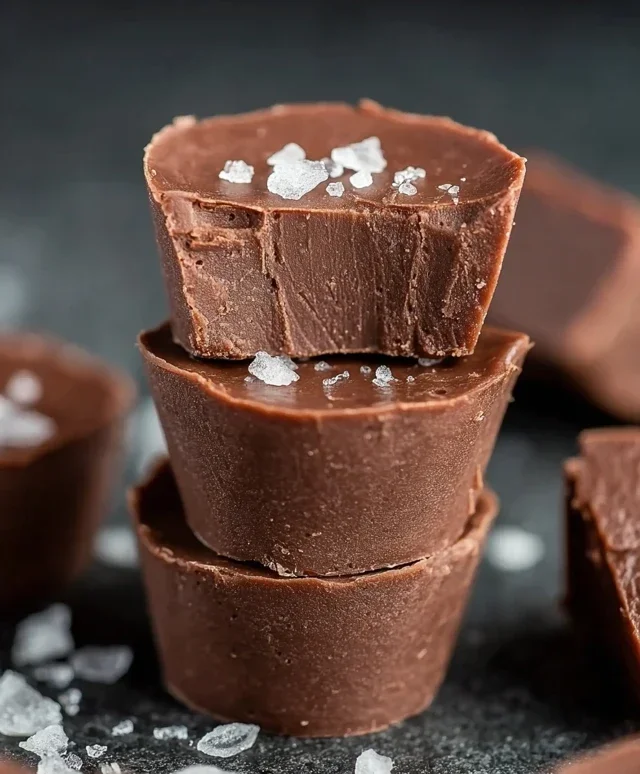
Sugar Free Fudge
If you’ve got a sweet tooth that craves rich, decadent chocolate but you’re trying to keep sugar out of your diet, you’re in for a treat! This sugar-free fudge recipe is surprisingly simple to make and delivers all the creamy, satisfying goodness of traditional fudge without any of the refined sugar. It’s perfect for those special occasions, a little afternoon pick-me-up, or when you just need to indulge in something chocolatey and delicious. I love that it uses ingredients I often have on hand, making it a convenient option for when a craving strikes. Plus, the texture is just divine – smooth, dense, and melts in your mouth. Let’s get started on making this delightful sugar-free treat.
Ingredients:
Cooking Instructions
Melting the Base
The first step in creating our luscious sugar-free fudge is to gently melt the chocolate chips and almond butter together. This is the foundation of our fudge, and getting it just right is key to a smooth and creamy texture. You have two primary methods for this, and both are quite effective. The stovetop method involves using a double boiler. To set this up, you’ll need a heatproof bowl that fits snugly over a saucepan filled with about an inch or two of water. Ensure the bottom of the bowl doesn’t touch the water. Bring the water to a gentle simmer over medium-low heat. Add your sugar-free chocolate chips and the almond butter to the bowl. Stir frequently with a heatproof spatula, allowing the ingredients to melt slowly and evenly. The low, indirect heat prevents the chocolate from scorching, which is crucial for maintaining its smooth texture and flavor. You’ll see the chips gradually soften and then start to merge with the almond butter. Be patient; this process can take about 5-7 minutes.
Alternatively, you can use a microwave. Place the sugar-free chocolate chips and almond butter in a microwave-safe bowl. Microwave on 50% power (or defrost setting) for 30-second intervals, stirring thoroughly after each interval. Continue this process until the mixture is mostly melted. Then, stir vigorously until it’s completely smooth. The key with microwave melting is to avoid overheating, which can cause the chocolate to seize or become grainy. Always err on the side of caution and stir more often than you think you need to. Once both the chocolate chips and almond butter are fully melted and combined into a homogenous, glossy mixture, remove it from the heat (or microwave).
Adding Flavor and Ensuring Smoothness
Once our chocolate and almond butter base is beautifully melted and smooth, it’s time to incorporate the vanilla extract. Vanilla extract adds a wonderful depth of flavor that complements the rich chocolate and nutty notes of the almond butter. Measure out your 1 teaspoon of vanilla extract and stir it thoroughly into the melted chocolate mixture. Make sure it’s evenly distributed throughout. This is also a good time to give the mixture a final, thorough stir. You want to ensure there are no lingering lumps of almond butter or un-melted chocolate chips. A good, vigorous stir will help achieve that perfect, silky-smooth consistency that is the hallmark of great fudge. The mixture should look glossy and luxurious at this point.
Preparing the Pan
While our fudge mixture is still warm and pliable, it’s time to prepare the vessel that will hold our delicious creation as it sets. You’ll need an 8×8 inch baking pan or a similar-sized square pan. To ensure easy removal of the fudge later, I highly recommend lining the pan with parchment paper. This creates a barrier that prevents the fudge from sticking to the pan. You can either cut a piece of parchment paper to fit the bottom of the pan and then fold the excess up the sides, or you can use what’s called a “parchment sling.” To create a sling, cut two strips of parchment paper that are longer than the width and length of the pan, respectively. Lay them across the bottom of the pan, overlapping in the center, so that the ends hang over the sides of the pan. This will create handles that you can use to lift the entire block of fudge out of the pan once it’s set, making cutting incredibly easy.
Pouring and Setting the Fudge
Now for the exciting part! Carefully pour the smooth, melted chocolate and almond butter mixture into your prepared baking pan. Use your spatula to gently spread the mixture evenly into the corners and across the entire surface of the pan. You want to create a uniform layer so that your fudge slices are all the same thickness. Once it’s spread out, gently tap the pan on the counter a couple of times. This helps to release any air bubbles that might be trapped within the mixture, contributing to a denser, more professional-looking fudge.
After pouring and smoothing, it’s time to let the magic happen – the setting process. You have a couple of options here, depending on your timeframe and preference. For the quickest results, you can place the pan in the refrigerator for about 1-2 hours, or until the fudge is firm to the touch. However, I often find that letting it set at room temperature yields the best texture and flavor development. If you have the patience, leave the pan on the counter in a cool, dry place for at least 4-6 hours, or even overnight. The slower setting process allows the flavors to meld and the texture to become perfectly dense and fudgy, without any hint of being too hard or brittle.
Cutting and Enjoying
Once your sugar-free fudge has completely set and is firm, it’s time to reveal your masterpiece. If you used the parchment sling method, simply lift the entire block of fudge out of the pan using the overhangin extractg parchment paper. If you didn’t use a sling, you might need to carefully run a knife around the edges of the pan to loosen it before inverting it onto a cutting board or gently lifting it out.
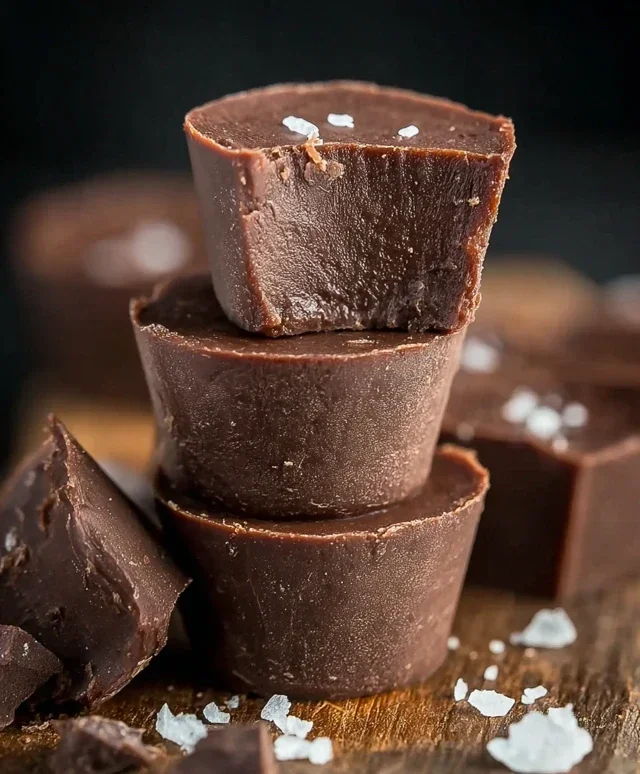
Now comes the satisfying part of cutting. Use a sharp knife to cut the fudge into desired bite-sized pieces. Small squares or rectangles work best. For cleaner cuts, you might want to warm your knife slightly by running it under hot water and then drying it thoroughly before each cut. This helps the knife glide through the fudge more easily. Arrange your beautiful, homemade sugar-free fudge on a serving plate and marvel at your creation. Store any leftover fudge in an airtight container at room temperature or in the refrigerator for longer shelf life. Enjoy every rich, guilt-free bite!
Conclusion:
You’ve mastered the art of creating delicious, sugar-free fudge! This recipe is truly fantastic because it delivers all the rich, decadent satisfaction of traditional fudge without the sugar rush and subsequent crash. It’s a testament to how wonderfully you can satisfy your sweet cravings with wholesome, smart ingredients. Perfect for those managin extractg their sugar intake, or simply looking for a healthier indulgence, this sugar free fudge is a game-changer. Enjoy it on its own as a delightful treat, or elevate your dessert experience by crum extractbling it over sugar-free ice cream or yogurt. For those feeling adventurous, consider adding a pinch of chili powder for a spicy kick, or a swirl of sugar-free caramel for an extra layer of flavor. I truly encourage you to give this recipe a try; you might be surprised at how easy it is and how incredibly satisfying the results are!
Frequently Asked Questions:
Q: Can I use a different type of sugar substitute?
A: Absolutely! While the recipe is tested with specific substitutes, feel free to experiment with your preferred sugar substitute, keeping in mind that some may have slightly different sweetness levels or textures. Erythritol, xylitol (with caution around pets), or a monk fruit blend are good starting points.
Q: How should I store my sugar free fudge?
A: Store your delightful sugar free fudge in an airtight container in the refrigerator. It will keep well for up to two weeks, maintaining its delightful texture and flavor.
Q: My fudge isn’t setting as firm as I’d like. What could be wrong?
A: Several factors can affect firmness. Ensure you’re accurately measuring your ingredients, especially the fats and thickeners. Temperature also plays a role; slightly cooler kitchen environments can help it set firmer. You might also try increasing the chilling time.
Sugar Free Fudge
A simple and delicious sugar-free fudge recipe made with chocolate chips and almond butter.
Ingredients
-
2 cups sugar free chocolate chips
-
1 cup almond butter
-
1 teaspoon vanilla extract
-
1/4 cup unsweetened cocoa powder
-
1/4 cup unsweetened almond milk
-
Pinch of salt
Instructions
-
Step 1
Line an 8×8 inch baking pan with parchment paper. -
Step 2
In a medium saucepan over low heat, melt the sugar-free chocolate chips and almond butter, stirring constantly until smooth. -
Step 3
Remove from heat and stir in the vanilla extract, unsweetened cocoa powder, unsweetened almond milk, and salt until well combined and smooth. -
Step 4
Pour the mixture into the prepared baking pan and spread evenly. -
Step 5
Refrigerate for at least 2-3 hours, or until firm. -
Step 6
Lift the fudge out of the pan using the parchment paper and cut into bite-sized pieces.
Important Information
Nutrition Facts (Per Serving)
It is important to consider this information as approximate and not to use it as definitive health advice.
Allergy Information
Please check ingredients for potential allergens and consult a health professional if in doubt.