Daisy Lemon Meringue Pie Recipe – Zesty & Sweet
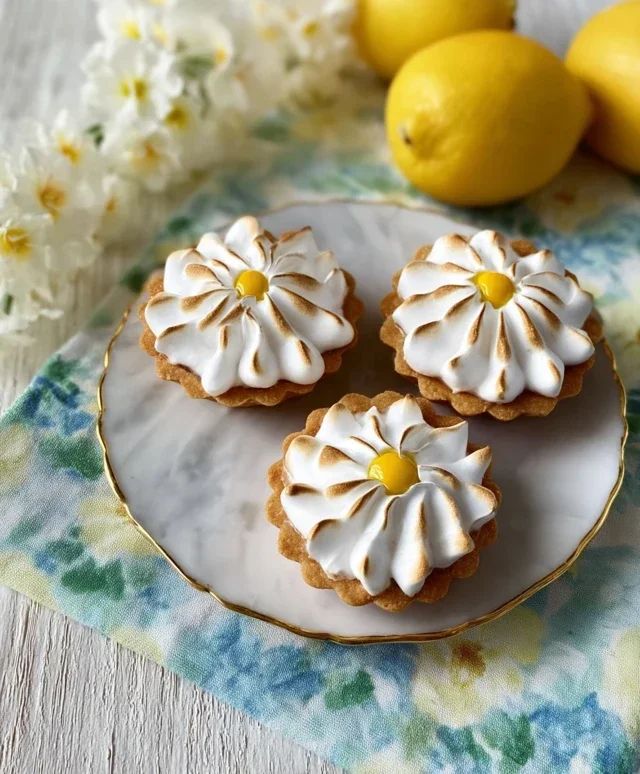
Daisy Lemon Meringue Pies are more than just a dessert; they’re sunshine in a bite. Imagin extracte a crisp, buttery crust cradling a vibrant, zesty lemon filling, all crowned with billowy, cloud-like meringue that’s been kissed by the oven’s heat to a golden perfection. Who doesn’t adore a classic lemon meringue pie? It’s that perfect marriage of tart and sweet, a delightful textural symphony that makes every spoonful an experience. What makes our Daisy Lemon Meringue Pies truly special? It’s the delicate balance we strike – our lemon curd is intensely flavorful without being overwhelming, and the meringue is just the right amount of sweet, ensuring it doesn’t overpower the star, the lemon. This recipe is designed to bring that bakery-worthy magic right into your own kitchen, creating memories and delightful smiles with every slice of this iconic Daisy Lemon Meringue Pie.
Daisy Lemon Meringue Pies
There’s something incredibly comforting and celebratory about a classic lemon meringue pie. The crisp, buttery pastry, the zingy, creamy lemon filling, and that ethereal, cloud-like meringue topping – it’s a dessert that truly sings. Today, we’re making individual Daisy Lemon Meringue Pies, perfect for sharing or for that delightful moment when you want a personal slice of sunshine. These little beauties are not as daunting as they might seem, and with a little care, you’ll be rewarded with a truly spectacular treat.
Ingredients:
Making the Sweet Pastry Base
We’ll start by crafting the perfect shortcrust pastry for our pie bases. This recipe is for a delightfully sweet and tender crust that complements the tartness of the lemon filling beautifully.
1. In a medium bowl, whisk together the 125g plain flour and 35g icing sugar. This ensures the sugar is evenly distributed throughout the flour, preventing any pockets of sweetness.
2. Add the 60g cold unsalted butter, cut into small cubes. Using cold butter is crucial for a flaky pastry. You can either use your fingertips to rub the butter into the flour until the mixture resembles fine breadcrum extractbs, or pulse it gently in a food processor. Be careful not to overwork the mixture at this stage; we want to keep the butter cold and in distinct pieces.
3. In a small separate bowl, lightly whisk the 1 large egg yolk with the 1 tbsp water. This will act as your binder. Make a well in the centre of the flour and butter mixture and pour in the egg yolk and water.
4. Gently bring the dough together using a knife or a spatula. You want to mix just enough to combine, so don’t knead it. If it seems a little dry, you can add another teaspoon of water, but be very sparing. The dough should just hold together when squeezed.
5. Tip the dough out onto a lightly floured surface and gently bring it together into a disc. Wrap it tightly in cling film and refrigerate for at least 30 minutes. This chilling period is essential; it allows the gluten to relax and the fat to firm up, which will make the pastry easier to roll out and result in a more tender crust.
Once chilled, divide the dough into portions suitable for your pie tins (I like to make four individual tart-sized pies). Roll out the pastry thinly and gently line your greased pie tins. Prick the bases all over with a fork to prevent them from puffing up during baking. You can blind bake these pastry shells for about 15-20 minutes at 180°C (160°C fan/Gas Mark 4) until lightly golden, then let them cool completely before filling. This step ensures a wonderfully crisp base that won’t go soggy.
Whipping up the Tangy Lemon Filling
Now for the star of the show – the vibrant, zesty lemon filling! This is where we get that perfect balance of sweet and tart.
1. In a medium saucepan (off the heat), whisk together the 200g granulated sugar and 40g cornflour. Cornflour is our thickener, and whisking it with the sugar prevents lumps from forming.
2. In a separate bowl, lightly beat the 3 large egg yolks. Gradually whisk in the 120ml fresh lemon juice and 240ml water until well combined.
3. Slowly pour the wet ingredients into the dry ingredients in the saucepan, whisking continuously to ensure a smooth mixture.
4. Place the saucepan over medium heat and cook, stirring constantly with a whisk, until the mixture thickens to a luscious, pudding-like consistency. This usually takes about 5-8 minutes. Be patient and keep stirring to prevent any sticking or scorching. The mixture should be thick enough to coat the back of a spoon.
5. Remove the pan from the heat and stir in the 25g unsalted butter and 1 tsp lemon zest. The butter will melt into the filling, giving it a lovely richness and gloss, while the zest adds an extra burst of fresh lemon flavour. Let the filling cool slightly, then pour it into your pre-baked and cooled pastry shells.
Creating the Dreamy Meringue Cloud
The meringue is what truly elevates these pies. A beautifully browned, soft meringue topping is both visually stunning and delightfully light.
1. In a very clean, grease-free bowl, whisk the 4 large egg whites with the 1/2 tsp cream of tartar until soft peaks form. Cream of tartar helps to stabilise the egg whites, giving us a more robust meringue. Ensure there is absolutely no trace of yolk in the whites, as this will prevent them from whipping properly.
2. Gradually add the 200g granulated sugar, a tablespoon at a time, while continuing to whisk. Whisk until the meringue is stiff, glossy, and the sugar has completely dissolved. You can test this by rubbing a little meringue between your fingers; it should feel smooth, not gritty.
3. Gently fold in the 1 tsp vanilla extract.
4. Spoon the meringue generously over the cooled lemon filling, making sure it touches the edges of the pastry to seal it. You can create beautiful swirls and peaks with your spoon or spatula for a dramatic effect.
5. Bake the pies in a preheated oven at 180°C (160°C fan/Gas Mark 4) for about 10-15 minutes, or until the meringue is golden brown and set. Keep a close eye on them as meringue can brown quickly.
Once baked, let the Daisy Lemon Meringue Pies cool completely on a wire rack before slicing and serving. Enjoy the symphony of textures and flavours!
Conclusion:
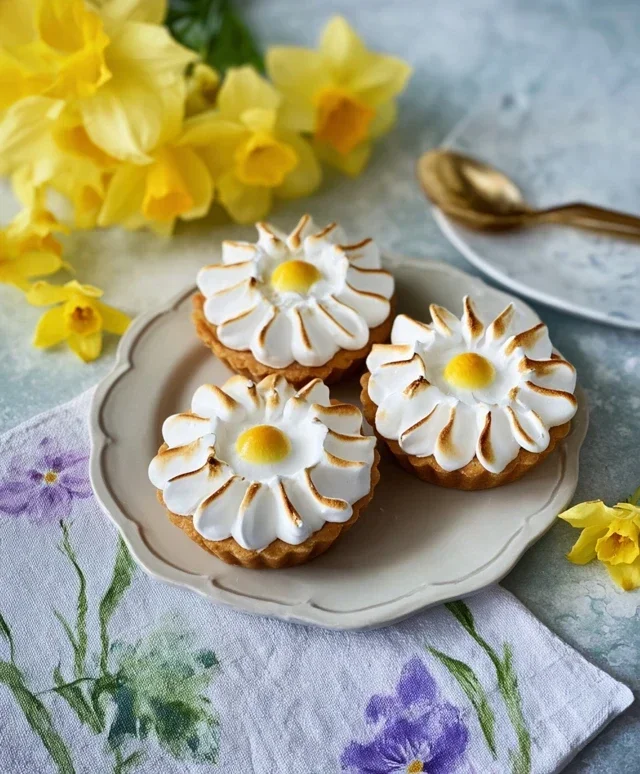
There you have it – the delightful recipe for Daisy Lemon Meringue Pies! This recipe is truly a winner because it strikes a perfect balance between tart, zesty lemon curd and a cloud-like, sweet meringue, all nestled in a crisp, buttery crust. It’s a classic dessert that’s surprisingly approachable for home bakers, offering that impressive “wow” factor without being overly complicated. Imagin extracte the joy on your guests’ faces as they take their first bite of this sunshine-in-a-pie!
For serving, these individual Daisy Lemon Meringue Pies are best enjoyed fresh, perhaps with a dusting of powdered sugar or a few fresh mint leaves for a pop of color and aroma. They make a beautiful centerpiece for any gathering, from casual brunches to elegant dinner parties. Don’t be afraid to get creative with variations! You could experiment with different citrus fruits like lime or grapefruit for the curd, or add a hint of lavender or vanilla bean for an extra layer of flavor. The possibilities are as bright as a summer day!
I truly hope you’re inspired to try making these Daisy Lemon Meringue Pies. They are a rewarding baking project that yields a truly spectacular result. Don’t shy away from the meringue; with a little patience and practice, you’ll achieve those beautiful, billowy peaks. Happy baking!
Frequently Asked Questions:
Why is my meringue weeping or watery?
Meringue weeping, often appearing as small beads of liquid on the surface or between the meringue and the filling, is usually caused by under-baking or excess moisture. Ensure your lemon curd is completely cool before topping with meringue. Also, make sure the meringue is fully cooked by baking it at a moderate temperature until the peaks are firm and golden. High humidity can also contribute to weeping.
Can I make the lemon curd ahead of time?
Absolutely! The lemon curd can be made up to two days in advance and stored in an airtight container in the refrigerator. This is a great way to break down the preparation process. Just be sure to bring it to room temperature or gently warm it slightly before filling your pie shells, and ensure it’s completely cooled before adding the meringue to prevent weeping.
How do I store leftover Daisy Lemon Meringue Pie?
Due to the meringue, Daisy Lemon Meringue Pies are best eaten the day they are made. However, if you have leftovers, they can be stored loosely covered in the refrigerator for up to one day. Avoid covering them tightly, as this can trap moisture and make the meringue soft. It’s important to note that the texture of the meringue might change slightly upon refrigeration.
Daisy Lemon Meringue Pies
Mini lemon meringue pies with a buttery shortcrust pastry and a zesty lemon filling topped with fluffy meringue.
Ingredients
-
125g plain flour
-
35g icing sugar
-
60g cold unsalted butter
-
1 large egg yolk
-
1 tbsp water
-
200g caster sugar (for filling)
-
4 large egg whites (for meringue)
-
80g granulated sugar (for meringue)
-
75ml fresh lemon juice
-
25g cornflour
-
2 tsp lemon zest
Instructions
-
Step 1
For the pastry, rub the flour, icing sugar and butter together until it resembles breadcrumbs. Stir in the egg yolk and water to form a dough. Wrap and chill for 30 minutes. -
Step 2
Preheat oven to 190°C (170°C fan/Gas 5). Roll out the pastry and cut out circles to line 6 mini pie tins. Prick the bases with a fork. -
Step 3
Bake the pastry cases for 10-12 minutes until lightly golden. Leave to cool. -
Step 4
For the filling, mix the caster sugar, cornflour, lemon juice and zest in a saucepan. Bring to a simmer, stirring constantly, until thickened. Remove from heat and stir in the egg yolk. -
Step 5
Pour the lemon filling into the cooled pastry cases. -
Step 6
For the meringue, whisk the egg whites until stiff peaks form. Gradually add the granulated sugar, whisking continuously until the meringue is glossy and holds stiff peaks. -
Step 7
Spoon or pipe the meringue over the lemon filling, ensuring it seals to the edges of the pastry. -
Step 8
Bake at 170°C (150°C fan/Gas 3) for 15-20 minutes, or until the meringue is golden brown.
Important Information
Nutrition Facts (Per Serving)
It is important to consider this information as approximate and not to use it as definitive health advice.
Allergy Information
Please check ingredients for potential allergens and consult a health professional if in doubt.