Cookie Monster Cheesecake Recipe – Fun & Delicious Dessert
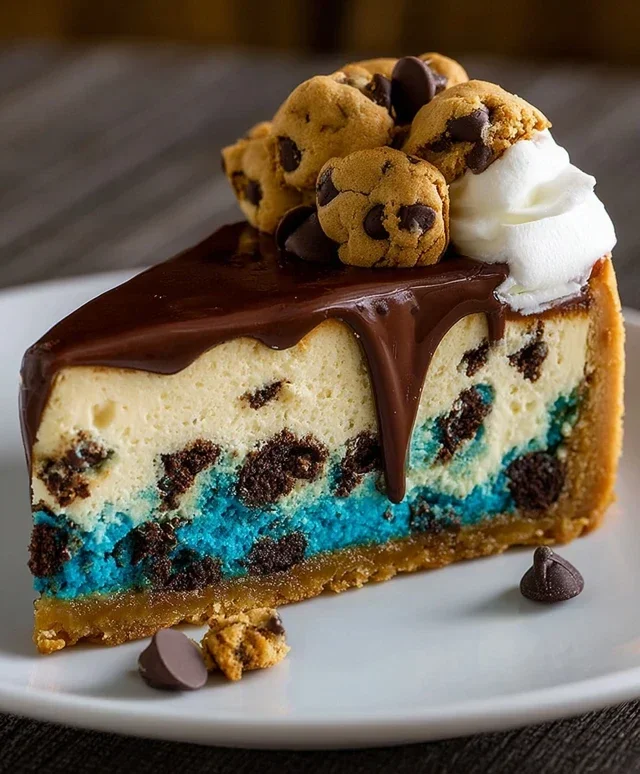
Cookie Monster Cheesecake is not just a dessert; it’s an experience. We all have those days, right? Days when only something ridiculously fun and utterly delicious will do. And that’s precisely where this iconic treat shines! Imagin extracte the vibrant blue hue, studded with chunks of chocolate chip cookies and swirls of even more cookie goodness, all nestled on a classic grabeef ham cracker crust. It’s a playful nod to our favorite fuzzy blue friend and a decadent indulgence that appeals to the kid in all of us. The sheer joy of slicing into a rich, creamy cheesecake bursting with cookie flavor is unparalleled. This Cookie Monster Cheesecake is designed to bring smiles, spark conversations, and create unforgettable dessert moments. Get ready to unleash your inner child and dive into a slice of pure happiness!
Cookie Monster Cheesecake
Get ready to dive into a world of blue, creamy, and utterly delightful cheesecake! This Cookie Monster Cheesecake is more than just a dessert; it’s an experience. Inspired by our favorite furry, blue friend, this recipe combines the rich decadence of cheesecake with the comforting flavors of chocolate chip cookies, all wrapped up in a playful, vibrant blue hue. It’s perfect for birthdays, celebrations, or just when you need a serious dose of happiness. Don’t be intimidated by cheesecake; we’ll walk through each step to ensure a wonderfully smooth and delicious result that will have everyone saying “Om nom nom!”
Ingredients:
Instructions:
Step 1: Crafting the Cookie Crust
First, we need to create the foundation for our magnificent cheesecake. In a medium bowl, combine the softened unsalted butter, 1/2 tsp salt, and the tightly packed brown sugar. Cream these together with a whisk or electric mixer until well combined and slightly fluffy. Next, add the egg and 1 tsp of vanilla extract. Mix again until everything is smoothly incorporated. Gradually add the all-purpose flour to this wet mixture, mixing until just combined. Be careful not to overmix here; we want a tender cookie crust. Finally, fold in the semisweet mini chocolate chips. This dough will be a bit soft.
Now, we’ll prepare our springform pan. I like to lightly grease a 9-inch springform pan to prevent sticking. Take your cookie dough and press it evenly into the bottom of the prepared pan. You can use the bottom of a glass or your fingers to create a firm, compact layer. Once pressed, pop this pan into the freezer for about 15-20 minutes. This chilling step helps the crust set and prevents it from crum extractbling too much when we bake it. After chilling, preheat your oven to 350°F (175°C). Bake the cookie crust for 10-12 minutes, or until it’s lightly golden around the edges. Remove it from the oven and let it cool completely on a wire rack while you prepare the cheesecake filling.
Step 2: Whipping Up the Dreamy Cheesecake Filling
This is where the magic truly happens! In a large bowl, beat the softened cream cheese until it’s incredibly smooth and creamy. It’s crucial that your cream cheese is at room temperature for this step; lumps are the enemy of smooth cheesecake! Add the cornflour (cornstarch), granulated sugar, and a pinch of salt. Beat again until everything is perfectly combined and there are no grainy bits of sugar left.
In a separate, smaller bowl, whisk together the 1/2 cup of whipping cream and 1 tsp of vanilla extract. Gradually pour this mixture into the cream cheese batter, mixing on low speed until just combined. Now, for the fun part: the color! Add a few drops of blue gel food coloring at a time, mixing well after each addition, until you achieve your desired Cookie Monster blue. Gel food coloring is best because it’s concentrated and won’t add extra liquid to your filling. Aim for a vibrant, cheerful blue.
Step 3: Incorporating the Eggs and Ensuring Smoothness
Gently mix in the three eggs, one at a time, beating on low speed until each egg is just incorporated before adding the next. Again, avoid overmixing, as too much air incorporated at this stage can lead to cracks in your cheesecake. Scrape down the sides and bottom of the bowl with a spatula to ensure everything is thoroughly combined. The batter should be smooth, luscious, and that perfect shade of blue.
Step 4: The Water Bath and Baking Technique
To achieve a perfectly smooth and crack-free cheesecake, we’re going to use a water bath, also known as a bain-marie. This method provides gentle, even heat and creates a humid environment that prevents the cheesecake from drying out and cracking. Tightly wrap the outside of your springform pan with a couple of layers of heavy-duty aluminum foil. This is essential to prevent water from seeping into the crust and filling. Place the foil-wrapped springform pan inside a larger baking pan (like a roasting pan).
Carefully pour hot water into the larger baking pan, ensuring the water comes about halfway up the sides of the springform pan. Now, gently place the entire setup into your preheated 350°F (175°C) oven. Bake for 50-60 minutes. The cheesecake is done when the edges are set, but the center still has a slight wobble. You can gently jiggle the pan to check this. It will continue to set as it cools.
Step 5: The Crucial Cooling Process
This is perhaps the most important step for a perfect cheesecake texture. Once the baking time is up, turn off the oven but leave the cheesecake inside with the oven door slightly ajar for another hour. This gradual cooling process is key to preventing cracks. After that hour, carefully remove the cheesecake from the water bath and place it on a wire rack to cool completely at room temperature. Once it has cooled to room temperature, cover it loosely with plastic wrap and refrigerate for at least 6 hours, or preferably overnight. This chilling period allows the cheesecake to fully set and its flavors to meld beautifully.
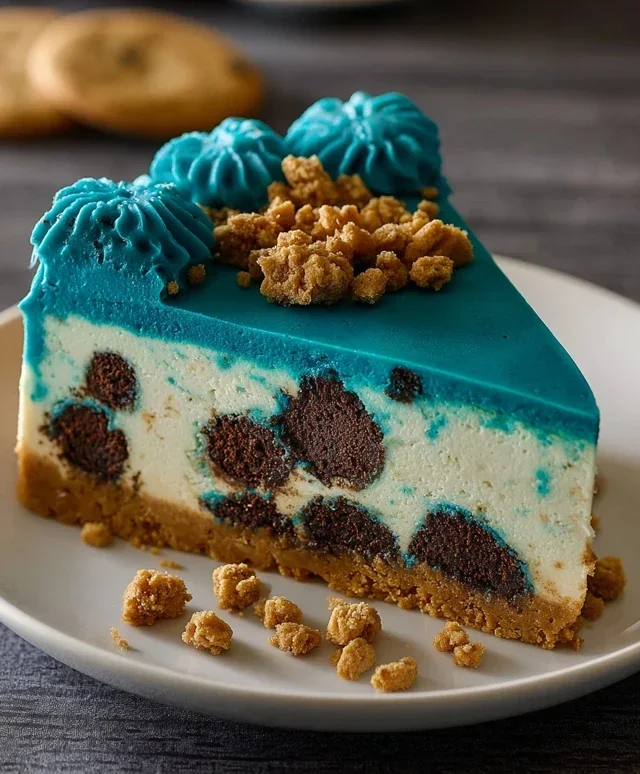
Once completely chilled and set, run a thin knife around the edge of the springform pan before releasing the sides. You can decorate your Cookie Monster Cheesecake with whipped cream, chocolate chips, or even some crum extractbled cookies to enhance the theme. Enjoy every delightful, blue, creamy bite!
Conclusion:
And there you have it – your guide to creating the most delightful Cookie Monster Cheesecake! This recipe is truly a showstopper, blending the creamy, dreamy texture of classic cheesecake with the irresistible crunch and flavor of cookies. It’s the perfect dessert for birthdays, holidays, or simply when you need a serious dose of fun and deliciousness. The vibrant blue hue and scattered cookie pieces make it visually stunning, and the taste? Absolutely out of this world!
For serving, consider pairing a slice with a dollop of whipped cream and an extra sprinkle of cookie crum extractbs. It’s also fantastic alongside a cold glass of milk, naturally! If you’re feeling adventurous, try incorporating different types of cookies into the filling or crust – chocolate chip is classic, but why not go for Oreos or even peanut butter cookies for a unique twist? Don’t be afraid to get creative with your toppings too; mini chocolate chips, cookie dough bites, or even a swirl of blue frosting can elevate this Cookie Monster Cheesecake even further.
I truly encourage you to give this recipe a try. It’s surprisingly straightforward, and the joy of seeing your own Cookie Monster Cheesecake come to life, and then sharing it with loved ones, is incredibly rewarding. Get ready for the “yum!” and the applause!
Frequently Asked Questions:
Can I make this cheesecake ahead of time?
Absolutely! Cheesecakes are best made at least a day in advance. This allows the cheesecake to set properly and the flavors to meld beautifully. Simply cover the cooled cheesecake tightly with plastic wrap and refrigerate until ready to serve.
What kind of blue food coloring should I use?
For the best vibrant blue color, I recommend using gel food coloring. You’ll need less of it compared to liquid food coloring, and it provides a more concentrated and even hue without diluting your cheesecake mixture.
My cheesecake cracked. Is it ruined?
Don’t worry! A cracked cheesecake is still delicious. Cracking often happens due to overbaking or rapid temperature changes. You can easily disguise any cracks with toppings like whipped cream, fruit, or extra cookie crum extractbles. The flavor will be just as amazing!
Cookie Monster Cheesecake
A vibrant blue cheesecake inspired by Cookie Monster, featuring a chocolate chip cookie crust and a creamy, decadent filling.
Ingredients
-
4 oz unsalted butter, melted (1/2 cup)
-
2.6 oz brown sugar, tightly packed (1/3 cup)
-
1 egg
-
4.4 oz all-purpose flour (125 g, 1 cup)
-
4 oz semisweet mini chocolate chips (2/3 cup)
-
16 oz cream cheese, softened (2 packets)
-
3.5 oz granulated sugar (1/2 cup)
-
2 tsp cornflour (cornstarch)
-
1 tsp vanilla extract
-
1/2 cup whipping cream (118 ml)
-
Blue gel food coloring
-
3 eggs
-
1/2 tsp salt
-
Pinch of salt
-
1 tsp vanilla extract
Instructions
-
Step 1
Preheat oven to 350°F (175°C). Grease a 9-inch springform pan. -
Step 2
For the crust: In a bowl, combine melted butter, brown sugar, egg, flour, 1/2 tsp salt, and chocolate chips. Press evenly into the bottom of the prepared springform pan. -
Step 3
Bake the crust for 10-12 minutes until lightly golden. Let cool completely. -
Step 4
For the filling: In a large bowl, beat cream cheese and granulated sugar until smooth. Beat in cornflour, 1 tsp vanilla extract, and the pinch of salt. -
Step 5
Add eggs one at a time, beating well after each addition. Stir in whipping cream and enough blue gel food coloring to achieve desired Cookie Monster blue. -
Step 6
Pour the filling over the cooled crust. Smooth the top. -
Step 7
Bake for 50-60 minutes, or until the edges are set and the center is slightly jiggly. Turn off the oven and let the cheesecake cool in the oven with the door ajar for 1 hour. -
Step 8
Remove from oven and let cool completely on a wire rack. Refrigerate for at least 4 hours, or preferably overnight, before serving.
Important Information
Nutrition Facts (Per Serving)
It is important to consider this information as approximate and not to use it as definitive health advice.
Allergy Information
Please check ingredients for potential allergens and consult a health professional if in doubt.