Cherries in the Snow- Delicious Dessert Recipe
Cherries in the Snow. This classic dessert conjures images of winter wonderlands and sweet, delightful indulgence. There’s a reason why this simple yet elegant treat holds such a special place in our hearts and on our holiday tables. The magic of Cherries in the Snow lies in its exquisite contrast: the vibrant, jewel-toned sweetness of cherries embraced by a delicate, ethereal coating that melts on the tongue like freshly fallen snow. It’s a dessert that’s both sophisticated and comforting, evoking childhood memories and adult celebrations alike. What truly sets Cherries in the Snow apart is its ability to transform humble ingredients into something truly spectacular, a testament to the beauty of simplicity and the power of a perfectly balanced flavor profile. Get ready to create your own winter wonderland with this timeless recipe!
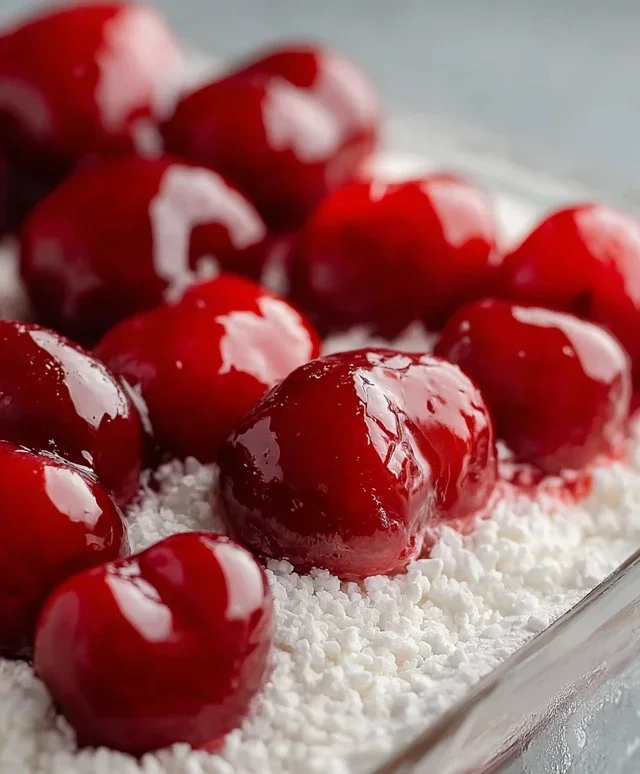
Cherries in the Snow
Cherries in the Snow is a dessert that truly lives up to its whimsical name. Imagin extracte a delicate, snowy landscape dotted with vibrant ruby-red jewels. This layered no-bake dessert is incredibly easy to assemble, making it perfect for potlucks, holidays, or just a delightful treat when you crave something sweet and impressive without a lot of fuss. It’s a crowd-pleaser that always disappears quickly, and the beauty of its presentation is matched only by its delicious, creamy, and fruity flavor.
The magic of Cherries in the Snow lies in its simplicity. We’re not talking about complicated pastry or delicate custards here. Instead, we’re focusing on combining a few key ingredients that work harmoniously to create a symphony of textures and tastes. The fluffy angel food cake forms the base, providing a light and airy foundation. Then comes the luscious, creamy layer, followed by the star of the show – the bright, tangy cherry pie filling. The contrast between the cool, creamy filling and the sweet, tart cherries is simply divine.
This dessert is also wonderfully versatile. While the classic combination is a winner, you can experiment with different fruit fillings if cherries aren’t your favorite, though I highly recommend sticking to the traditional for this recipe to truly capture the “snow” and “cherry” essence. It’s a dessert that doesn’t require any baking, which is a huge advantage, especially during warmer months when you want to keep your kitchen cool. Simply assemble, chill, and serve!
Let’s get to the good stuff – gathering your ingredients and bringin extractg this delightful dessert to life.
Ingredients:
Instructions:
Preparing the Creamy Layer
The first step in creating our Cherries in the Snow is to prepare the luscious creamy filling. This layer is what gives the dessert its “snowy” appearance and provides a rich, smooth counterpoint to the fruity topping.
1. In a large mixing bowl, combine the 8 ounces of softened cream cheese with 1/2 cup of powdered sugar. It’s crucial that your cream cheese is at room temperature. This allows it to blend smoothly without any lumps. If your cream cheese is still cold and firm, it will be very difficult to incorporate evenly, leading to a less-than-perfect texture. You can soften cream cheese by leaving it on the counter for about an hour, or by gently microwaving it for 10-15 second intervals, being careful not to melt it. Once the cream cheese and powdered sugar are in the bowl, use an electric mixer (handheld or stand mixer) to beat them together until they are light, fluffy, and completely smooth. Scrape down the sides of the bowl occasionally to ensure everything is incorporated.
2. Gradually add the 1/2 cup of 2% milk to the cream cheese mixture while continuing to beat. Mix on a low to medium speed until the milk is fully incorporated and the mixture has a smooth, creamy consistency. It should be pourable but not watery. This step further lightens the cream cheese base and creates a perfect texture for folding into the whipped topping. Again, ensure there are no pockets of unmixed cream cheese.
3. Gently fold in the 12 ounces of thawed Cool Whip whipped topping into the cream cheese mixture. It’s important to use a spatula and fold rather than vigorously mixing. This preserves the airy texture of the Cool Whip. Start by adding about a third of the Cool Whip and gently folding it in until just combined. Then, add the remaining Cool Whip and continue to fold until no white streaks of the cream cheese mixture are visible. You want a uniform, fluffy, and snow-like consistency. Overmixing can deflate the whipped topping, resulting in a denser, less appealing layer.
Assembling the Dessert
Now that our creamy “snow” is ready, it’s time to assemble the layers that will make Cherries in the Snow so visually appealing and delicious.
4. Prepare your angel food cake. You’ll need one pre-baked 9-inch angel food cake. The easiest way to do this for this recipe is to cut or tear the cake into bite-sized pieces. You can use a serrated knife to cut it into cubes, or simply break it apart with your hands into irregular, rustic pieces. Place these cake pieces in the bottom of a 9×13 inch baking dish or a similarly sized trifle bowl. Ensure the cake pieces are spread out evenly to form a solid base. This light, airy cake will soak up some of the delicious moisture from the other layers as it chills, becoming even more delightful.
5. Spoon the prepared creamy mixture evenly over the layer of angel food cake pieces. Gently spread the cream cheese and Cool Whip mixture to cover the cake completely. The goal is to create a smooth, white layer that resembles a blanket of snow. Take your time and ensure there are no gaps. Once the creamy layer is in place, it’s time for the vibrant cherries. Open both cans of cherry pie filling. Carefully spoon the cherry pie filling over the creamy layer. You can spread it evenly, or create swirls and patterns for a more artistic presentation. Some people prefer to dollop the cherry filling in mounds, while others like to spread it out more uniformly. Either way, the bright red of the cherries peeking through and contrasting with the white creamy layer is what gives this dessert its signature look.
Chilling and Serving
The final, and perhaps most important, step is allowing the flavors to meld and the dessert to chill to the perfect temperature.
6. Cover the baking dish or trifle bowl tightly with plastic wrap. Place the Cherries in the Snow in the refrigerator for at least 4 hours, or preferably overnight. This chilling time is essential for several reasons. Firstly, it allows the creamy layer to firm up properly, making the dessert easier to serve. Secondly, and most importantly, it allows the flavors to meld together beautifully. The cake will soften slightly, the cream cheese mixture will develop a firmer texture, and the cherry filling will meld its tart sweetness with the creamy layer. When you’re ready to serve, simply remove the plastic wrap and enjoy. You can garnish with a few extra cherries or a dollop of whipped cream if desired, but it’s absolutely stunning on its own.
Cherries in the Snow is a testament to how simple, high-quality ingredients can come together to create something truly magical. I hope you enjoy making and savoring this delightful dessert as much as I do!
Conclusion:
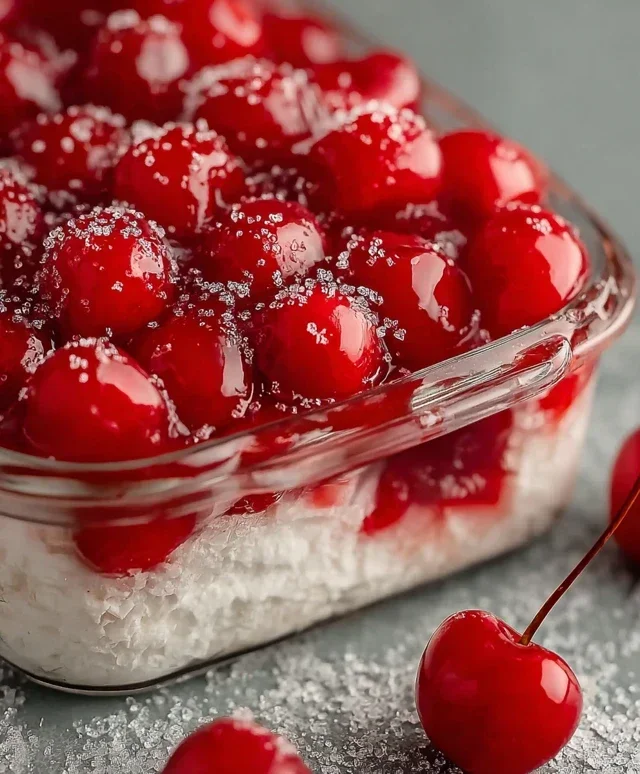
I hope you’ve enjoyed learning how to create this delightful ‘Cherries in the Snow’ dessert! It’s truly a showstopper, boasting a beautiful visual appeal with its vibrant cherry topping contrasting against a creamy, snow-like base. The subtle sweetness of the cherries, combined with the light and airy texture of the dessert, makes it incredibly refreshing and satisfying, perfect for any occasion. Whether you’re hosting a dinner party or simply craving a special treat, this recipe is sure to impress your guests and bring a smile to your face. Don’t hesitate to experiment with this recipe; it’s forgiving and adaptable.
Serving this dessert is a joy. It looks stunning on its own, but you can elevate it further by garnishing with a sprig of fresh mint, a dusting of powdered sugar, or even a few slivered almonds for added texture. For variations, consider using a different type of berry for the topping, like raspberries or blueberries, if cherries aren’t in season or to create a different flavor profile. You could also fold in a bit of citrus zest, like lemon or orange, into the creamy base for an extra burst of freshness. I truly encourage you to give this ‘Cherries in the Snow’ recipe a try. It’s a wonderful way to add a touch of elegance and deliciousness to your dessert repertoire!
Frequently Asked Questions:
Can I make this dessert ahead of time?
Yes, absolutely! This ‘Cherries in the Snow’ is an excellent make-ahead dessert. You can prepare the creamy base and the cherry topping separately a day in advance and store them in the refrigerator. Assemble them just before serving for the freshest taste and presentation.
What if I don’t have fresh cherries?
No problem at all! You can easily use frozen cherries. Thaw them completely and drain any excess liquid before using them in the topping. Canned cherry pie filling can also be a convenient substitute, though you might want to reduce the added sugar slightly to account for its sweetness.
Cherries in the Snow
A light and airy no-bake dessert featuring layers of creamy cheese filling, angel food cake, and sweet cherry topping.
Ingredients
-
8 ounces cream cheese, room temperature
-
1/2 cup powdered sugar
-
1/2 cup 2% milk
-
12 ounces Cool Whip whipped topping, thawed
-
1 pre-baked 9-inch angel food cake
-
2 cans cherry pie filling (21 ounces each)
Instructions
-
Step 1
In a medium bowl, beat the softened cream cheese and powdered sugar until smooth. -
Step 2
Gradually beat in the milk until well combined and the mixture is smooth. -
Step 3
Gently fold in the thawed Cool Whip until no streaks remain. -
Step 4
Tear the angel food cake into bite-sized pieces and layer half of the cake pieces in the bottom of a 9×13 inch baking dish. -
Step 5
Spread half of the cream cheese mixture evenly over the cake layer. -
Step 6
Spoon one can of cherry pie filling over the cream cheese layer. -
Step 7
Repeat the layers with the remaining cake pieces, cream cheese mixture, and the second can of cherry pie filling. -
Step 8
Chill for at least 2 hours before serving.
Important Information
Nutrition Facts (Per Serving)
It is important to consider this information as approximate and not to use it as definitive health advice.
Allergy Information
Please check ingredients for potential allergens and consult a health professional if in doubt.