Easter Dirt Cups – Fun & Easy Treat Recipe
Easter Dirt Cups are undeniably one of the most delightful and playfully delicious treats to grace any spring celebration. If you’re looking for a dessert that brings smiles to faces of all ages and requires absolutely zero baking expertise, then our Easter Dirt Cups are the perfect answer! These charming concoctions capture the fun spirit of Easter with their whimsical presentation and satisfyingly simple, yet incredibly tasty, layers. What makes these Easter Dirt Cups so beloved? It’s their magical ability to transform everyday ingredients like crushed cookies and creamy pudding into an edible garden that kids (and let’s be honest, adults too!) adore diggin extractg into. We’ll show you how to create these delightful Easter Dirt Cups, complete with a few special touches that will make yours truly stand out from the rest. Get ready to embrace the fun and flavor!
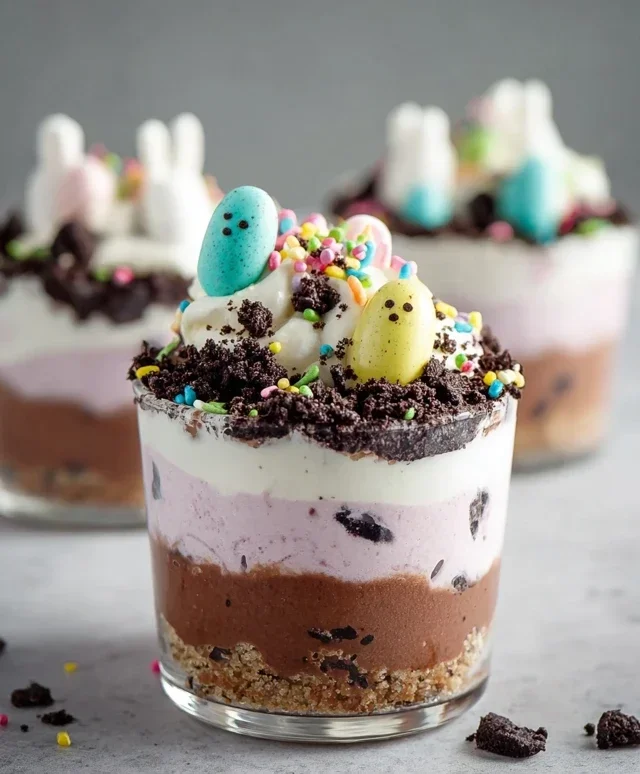
Easter Dirt Cups
Easter Dirt Cups are a whimsical and delicious dessert that brings a touch of fun to any spring celebration. These delightful treats are a playful take on the classic “dirt cup” dessert, transformed with vibrant Easter colors and festive decorations. They’re incredibly easy to make, making them a perfect activity for kids and a stress-free addition to your Easter dessert table. Imagin extracte layers of creamy pudding “dirt” topped with colorful “grass” and adorned with adorable candy eggs and Peeps – it’s a miniature Easter garden in a cup! The combination of textures, from the smooth pudding to the crunchy cookie crum extractbs and chewy marshmallow, is incredibly satisfying. Plus, the customizable nature of these dirt cups means you can tailor them to your favorite Easter colors and candy preferences. Let’s dive into creating these delightful Easter treats!
Ingredients:
Creating the Creamy “Dirt” Base
The foundation of our Easter Dirt Cups is a rich and creamy pudding mixture that mimics the texture and color of soil. We’ll start by preparing the instant vanilla pudding. In a medium-sized mixing bowl, combine the entire package of vanilla instant pudding mix with the 2 cups of cold milk. It’s crucial to use cold milk for the pudding to set properly and achieve the desired consistency. Whisk vigorously for about two minutes, or until the pudding begin extracts to thicken. Don’t be discouraged if it looks a little loose at first; it will continue to set as it chills. Once the pudding has reached a good thickness, gently fold in the thawed Cool Whip. This adds an extra layer of creaminess and a delightful lightness to the pudding, making it more reminiscent of fluffy, moist soil than a dense pudding. Fold it in gently to maintain the airiness of the Cool Whip.
Coloring Our Easter Garden
Now for the fun part – adding a festive Easter touch! We’ll use food coloring to create a subtle, springtime hue for our pudding “dirt.” Divide the pudding mixture into two separate bowls. In one bowl, add a few drops of purple food coloring and stir until evenly distributed. In the other bowl, add a few drops of pink food coloring and mix thoroughly. You can adjust the amount of food coloring to achieve your desired shade. The goal is not to make them intensely colored, but rather to give them a gentle, pastel Easter tint. This adds a surprise element when your guests dig into their cups! Alternatively, you can choose to keep one bowl plain white for a stark contrast, or even add a hint of green to one bowl for a more varied soil effect.
Preparing the “Oreo Soil”
The “dirt” in our dirt cups is made from crushed Oreo cookies. For the best texture, it’s important to finely crush the Oreos. You can do this by placing the cookies in a zip-top bag and crushing them with a rolling pin or the bottom of a heavy pan. Make sure to remove the cream filling from the Oreos before crushing them, as this will prevent the filling from making your “dirt” too sticky and clumpy. Aim for a fine, crum extractbly texture that resembles actual soil. Some smaller chunks are perfectly fine and add to the rustic charm. You’ll want to have a generous amount of these crushed cookies, as they will be used to layer and top our cups.
Assembling Our Easter Dirt Cups
Now it’s time to assemble these charming desserts! Grab your serving cups or clear glasses. Small clear plastic cups, mason jars, or even small flower pots work wonderfully. Begin extract by spooning a layer of your colored pudding into the bottom of each cup. You can alternate between the purple and pink layers, or create a marbled effect by swirling them together. Next, sprinkle a generous layer of your crushed Oreo “dirt” over the pudding. Continue layering the pudding and the cookie crum extractbs until you reach the top of your cups. For a truly realistic “dirt” appearance, ensure the top layer is predominantly cookie crum extractbs. Gently press down on the layers to create a stable base for your decorations.
Adding the Finishing Touches: Easter Decorations
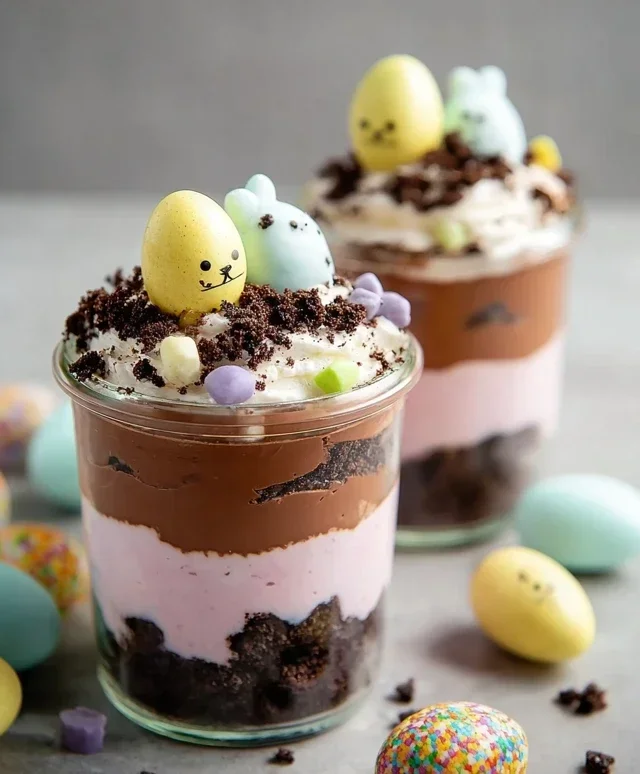
This is where your Easter Dirt Cups truly come to life! We’ll create our edible Easter garden. First, let’s make some colorful “grass.” Take your shredded coconut and divide it into small bowls. Add a few drops of green food coloring to one bowl and mix until the coconut is evenly colored. You can also add a touch of yellow or even a hint of blue for more variegated grass. Once your coconut “grass” is ready, sprinkle it over the top layer of cookie crum extractbs. This will give the appearance of a lush, green lawn. Now, artfully arrange your candy eggs amongst the “grass.” Nestle them in, as if they’ve been freshly laid. Finally, add your Peeps marshmallow chicks or bunnies. You can place them standing up or nestled down into the “dirt” for a playful touch. Don’t be afraid to get creative with the placement! These decorations not only look adorable but add delightful textural and flavor elements to each bite.
Tips for Perfect Easter Dirt Cups:
Conclusion:
There you have it – a delightful and incredibly easy recipe for Easter Dirt Cups that’s sure to be a hit with everyone! These cups are fantastic because they require minimal effort, making them perfect for a fun family activity or a last-minute treat. The combination of creamy pudding, crum extractbly chocolate cookies, and sweet gummy worms is a classic for a reason, evoking childhood joy and festive fun. They’re not just delicious; they’re visually appealing and customizable, adding a special touch to any Easter celebration. Whether you’re hosting a brunch or sending goodie bags, these Easter Dirt Cups are a guaranteed crowd-pleaser. I highly encourage you to give this recipe a try – you won’t be disappointed!
For serving, present them in individual clear cups, mason jars, or even small terracotta pots for an extra earthy touch. Garnish with a sprig of mint or a small decorative Easter pick. For variations, consider using different colored puddings like white chocolate or cheesecake flavor. You could also swap out the gummy worms for chocolate bunnies, jelly beans, or even edible flowers. Get creative and make these Easter Dirt Cups your own!
Frequently Asked Questions:
Can I make these ahead of time?
Absolutely! You can prepare the pudding and crush the cookies a day in advance. Assemble the cups a few hours before serving to ensure the cookies remain slightly crunchy. Storing them covered in the refrigerator is best.
What if I don’t have gummy worms?
No problem! You can use a variety of other candies to decorate your Easter Dirt Cups. Chocolate-covered raisins, mini chocolate eggs, or even small candy carrots work wonderfully to enhance the Easter theme.
Easter Dirt Cups
A fun and festive Easter dessert, these dirt cups mimic a garden scene with chocolate ‘dirt’, creamy pudding, and adorable candy decorations.
Ingredients
-
1 package (3.9 oz.) vanilla instant pudding mix
-
2 cups cold milk
-
1 container (8 oz.) Cool Whip, thawed
-
Food coloring (purple and pink suggested)
-
1 package Oreo cookies, finely crushed with filling removed
-
Shredded coconut
-
Candy eggs (mini egg candies)
-
Peeps marshmallow chicks or bunnies
Instructions
-
Step 1
In a large bowl, whisk together the vanilla instant pudding mix and cold milk until well combined and thickened. Let it sit for 5 minutes. -
Step 2
Gently fold the thawed Cool Whip into the pudding mixture until smooth and no streaks remain. Divide the mixture into two bowls. Add a few drops of purple food coloring to one bowl and pink food coloring to the other. Stir each until evenly colored. -
Step 3
Optional: Color shredded coconut by placing it in a resealable bag with a few drops of green food coloring and shaking until coated. Let dry slightly on a plate. -
Step 4
To assemble the dirt cups, layer the crushed Oreo cookies (the ‘dirt’) and the colored pudding mixtures in individual clear cups or a trifle dish. -
Step 5
Top each dirt cup with more crushed Oreos to create a dirt effect. Decorate with candy eggs, Peeps, and the colored shredded coconut to resemble a garden. -
Step 6
Chill the dirt cups for at least 30 minutes before serving to allow the flavors to meld and the pudding to set further.
Important Information
Nutrition Facts (Per Serving)
It is important to consider this information as approximate and not to use it as definitive health advice.
Allergy Information
Please check ingredients for potential allergens and consult a health professional if in doubt.