Easy Japanese Tuna Onigiri Quick Recipe
15-min. Easy Japanese Tuna Onigiri are your new best friend when hunger strikes and time is short. If you’ve ever found yourself craving a satisfying, flavorful, and utterly delightful snack or light meal, then you’ve probably heard whispers of the beloved Japanese rice ball, or onigiri. These aren’t just any rice balls; our 15-min. Easy Japanese Tuna Onigiri offer a perfect balance of fluffy rice, savory tuna filling, and that unmistakable umami kick that has captured hearts worldwide. What makes them so special? It’s the incredible versatility and the way a simple combination of ingredients can create something so profoundly comforting and delicious. In just fifteen minutes, you can transform humble rice and pantry staples into a portable powerhouse of flavor, perfect for busy lunches, quick dinners, or even an impressive appetizer. Get ready to discover how effortlessly you can master these delightful little treasures!
Why You’ll Love This Recipe
The ultimate quick and tasty fix!
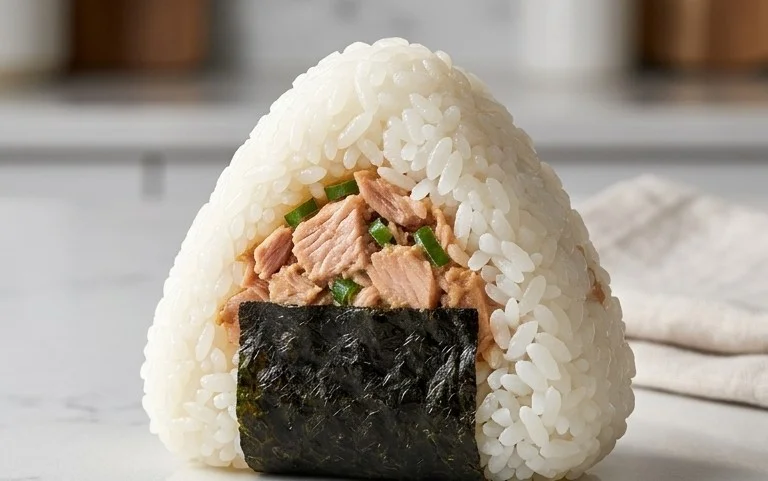
15-Min. Easy Japanese Tuna Onigiri
Craving a quick, satisfying, and authentic Japanese snack or light meal? Look no further than these 15-minute easy Japanese tuna onigiri! Onigiri, also known as Japanese rice balls, are a staple of bento boxes and a beloved comfort food. They’re incredibly versatile, and this tuna mayonnaise filling is a classic for a reason – it’s creamy, savory, and utterly delicious. The beauty of onigiri is their simplicity and portability. You can whip these up for a quick lunch at home, pack them for a picnic, or even enjoy them as a late-night snack. With just a few pantry staples and about 15 minutes of your time, you’ll be enjoying these delightful little rice parcels. I love making these because they feel so wholesome and nourishing, and the process of shaping them is almost meditative!
Ingredients:
Making Your Onigiri:
The process of making onigiri is quite straightforward, and with a little practice, you’ll be shaping them like a pro. The key is to have your ingredients prepped and ready to go so you can assemble them quickly while the rice is still warm.
Step 1: Prepare the Tuna Filling
Start by preparing your delicious tuna filling. Open your can of tuna. If you’re using tuna packed in oil, drain off most of the oil, leaving just a little bit for moisture and flavor. If you’re using tuna packed in water, drain it thoroughly. Place the drained tuna in a small bowl. Add the Japanese mayonnaise to the bowl with the tuna. If you don’t have Japanese mayonnaise, regular mayonnaise will work perfectly fine, though Japanese mayo offers a slightly richer, tangier flavor that’s ideal for onigiri. Gently mix the tuna and mayonnaise together until they are well combined and form a creamy, spreadable mixture. Avoid over-mashing the tuna; you want a bit of texture.
Step 2: Prepare the Rice
For the best onigiri, it’s crucial to use short-grain Japanese rice. This type of rice is stickier than other varieties, which helps the onigiri hold its shape beautifully. If you’re using freshly cooked rice, make sure it’s still warm. Warm rice is easier to shape and holds together better than cold rice. If your rice has cooled down, you can gently warm it in the microwave or on the stovetop. In a separate small bowl, mix the 1/2 teaspoon of salt with about 2 tablespoons of warm water. This salted water will be used to moisten your hands, which is a critical step to prevent the rice from sticking to you.
Step 3: Shape the Onigiri Base
This is where the magic happens! Take a portion of the warm rice, about 1/2 cup, and place it in the palm of one of your hands. Moisten your hands with the salted water you prepared. This might seem a bit strange, but it’s essential for a smooth shaping process. Gently pat and press the rice, starting to form a rough ball or a triangle shape. Don’t press too hard, or you’ll end up with dense, hard rice. The goal is to create a cohesive shape that will hold its filling. You can make a small indentation in the center of the rice with your thumb.
Step 4: Add the Tuna Filling and Seal
Now, spoon about 1 to 1.5 tablespoons of the prepared tuna mayonnaise mixture into the indentation you made in the rice. Be careful not to overfill it, as this can make it difficult to seal the onigiri properly. Once the filling is in place, gently bring the edges of the rice around the filling to enclose it. Continue to pat and shape the onigiri, forming it into your desired shape – typically a triangle, a ball, or a cylinder. If you’re aiming for the classic triangular shape, use your fingers to create the three distinct corners. The warmth of the rice and the slight moisture from your hands will help everything stick together.
Step 5: Wrap with Nori and Garnish
Finally, it’s time to add the finishing touches. Take one sheet of nori. If you prefer less nori, you can cut a sheet in half. You can either wrap the entire onigiri with a strip of nori, or place a small piece on one side for decoration. For a simple wrap, cut a strip of nori about 1 inch wide and long enough to circle your onigiri. Moisten the ends of the nori with a tiny bit of water to help it stick. Gently press the nori strip onto your shaped onigiri. If you’re using sesame seeds, sprinkle them over the top of the onigiri or onto the nori for a lovely visual appeal and a subtle nutty flavor. Repeat this process with the remaining rice and filling until you have used up all your ingredients.
Enjoy your homemade, 15-minute Japanese tuna onigiri! They are best enjoyed fresh, but they will keep in an airtight container for a day or two.
Notes:
If you are making fresh rice specifically for this recipe, cook about 1 cup of short-grain rice according to your rice cooker’s or stovetop instructions. Allow it to cool slightly so it’s warm, not scalding hot, before proceeding with the recipe. This amount of uncooked rice will yield approximately 2 cups of cooked rice.

Conclusion:
And there you have it – your very own delicious and satisfying Japanese Tuna Onigiri, ready in just 15 minutes! This recipe is truly a lifesaver for busy weeknights or quick lunches. Its simplicity, coupled with the wonderful umami of the tuna filling and the comforting texture of the rice, makes it an absolute winner. It’s incredibly versatile, perfect for a solo snack, a light meal, or even as part of a bento box. I encourage you all to give this 15-min. Easy Japanese Tuna Onigiri a try; you won’t be disappointed!
For serving, these onigiri are fantastic on their own, but they also pair beautifully with a side of miso soup, a simple green salad, or some pickled gin extractger. Don’t be afraid to experiment with variations! You could add a dash of sriracha for a little heat, some chopped scallions for freshness, or even a sprinkle of furikake for extra flavor and texture. The possibilities are endless!
Frequently Asked Questions:
Can I make the rice ahead of time?
Absolutely! You can cook your sushi rice in advance and let it cool to room temperature. Just make sure to cover it to prevent it from drying out before you’re ready to form your onigiri.
What if I don’t have sushi rice?
While sushi rice is ideal for its stickiness, you can use short-grain white rice in a pinch. You might need to adjust the amount of water when cooking to ensure it’s not too dry. It might be a little trickier to shape, but it will still be delicious!
Can I freeze onigiri?
It’s generally not recommended to freeze onigiri as the rice texture can change significantly upon thawing. They are best enjoyed fresh!
15-min. Easy Japanese Tuna Onigiri
Quick and simple tuna onigiri, perfect for a light meal or snack. Ready in just 15 minutes using canned tuna and cooked rice.
Ingredients
-
2 sheets nori (or 1/2 sheet)
-
1 tsp sesame seeds (optional)
-
2 cups cooked short grain rice
-
1/2 tsp salt
-
5.29 oz canned tuna (in oil recommended)
-
2 tbsp Japanese mayo
Instructions
-
Step 1
In a bowl, flake the canned tuna with a fork and mix with Japanese mayonnaise and salt until well combined. -
Step 2
In a separate bowl, gently mix the cooked short grain rice with a pinch of salt (if desired). It’s easier to handle when slightly cooled but still warm. -
Step 3
Wet your hands with water and a tiny bit of salt to prevent the rice from sticking. Take about 1/2 cup of rice and shape it into a triangle or ball. -
Step 4
Make a small indentation in the center of the rice ball and fill it with the tuna mixture. Cover the filling with a little more rice and reshape. -
Step 5
Wrap the onigiri with a strip of nori seaweed. If using sesame seeds, sprinkle them over the onigiri for garnish. -
Step 6
Repeat with the remaining rice and tuna mixture. Serve immediately or pack for lunch.
Important Information
Nutrition Facts (Per Serving)
It is important to consider this information as approximate and not to use it as definitive health advice.
Allergy Information
Please check ingredients for potential allergens and consult a health professional if in doubt.