Jolly Rancher Candy Apples Recipe – Sweet & Easy Treat
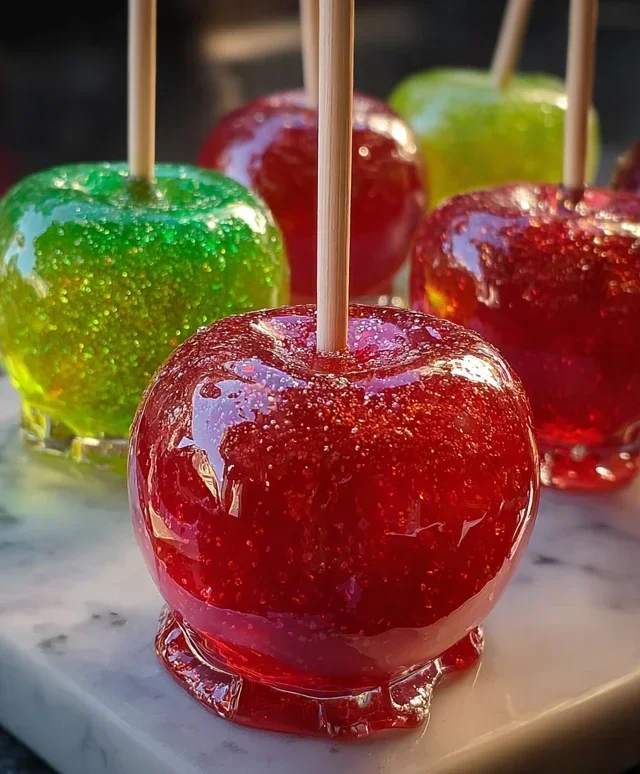
Jolly Rancher Candy Apples are more than just a nostalgic treat; they’re a vibrant explosion of color and flavor that instantly transports us back to simpler times. Who doesn’t remember the thrill of choosing your favorite juicy apple, only to have it coated in a shimmering, crackly shell of pure sugary delight? The sheer visual appeal of these Jolly Rancher Candy Apples is undeniable, with their jewel-toned hues beggin extractg to be bitten into. What truly sets these apart is the playful, tangy sweetness of the Jolly Rancher candies, which infuses the classic candy apple with an extra layer of exciting, fruity zest. It’s this unique combination – the crisp apple, the satisfying crunch, and the burst of familiar candy flavor – that makes Jolly Rancher Candy Apples an absolute showstopper, perfect for parties, holidays, or simply as a fun weekend project. Get ready to create a masterpiece that’s as fun to make as it is to devour!
Jolly Rancher Candy Apples: A Burst of Fruity Fun!
Get ready for a technicolor explosion of sweetness! These Jolly Rancher Candy Apples are a vibrant and delicious twist on a classic fall treat. Forget the plain caramel; we’re talking about a shatteringly crisp, intensely fruity candy shell that practically sings with flavor. Perfect for parties, holidays, or just a fun weekend project, these apples are sure to bring smiles all around. The beauty of this recipe lies in its simplicity and the incredible flavor payoff from those beloved Jolly Rancher candies. Let’s dive in and create some edible magic!
Ingredients:
Preparing Your Apples
The first step to any great candy apple is choosing the right apple. I love using Granny Smith apples for their tartness, which beautifully contrasts with the sweet candy shell. However, Honeycrisp and Fuji are also excellent choices, offering a delightful sweetness and satisfying crunch. Before we do anything else, it’s crucial to wash your apples thoroughly and then dry them completely. Any moisture on the apple’s skin can prevent the candy coating from adhering properly, leading to a sticky, uneven finish. Once they’re clean and dry, insert a wooden skewer or popsicle stick firmly into the stem end of each apple. Make sure it’s pushed in deep enough to provide a good handle but not so far that it pokes out the other side.
Creating the Jolly Rancher Coating
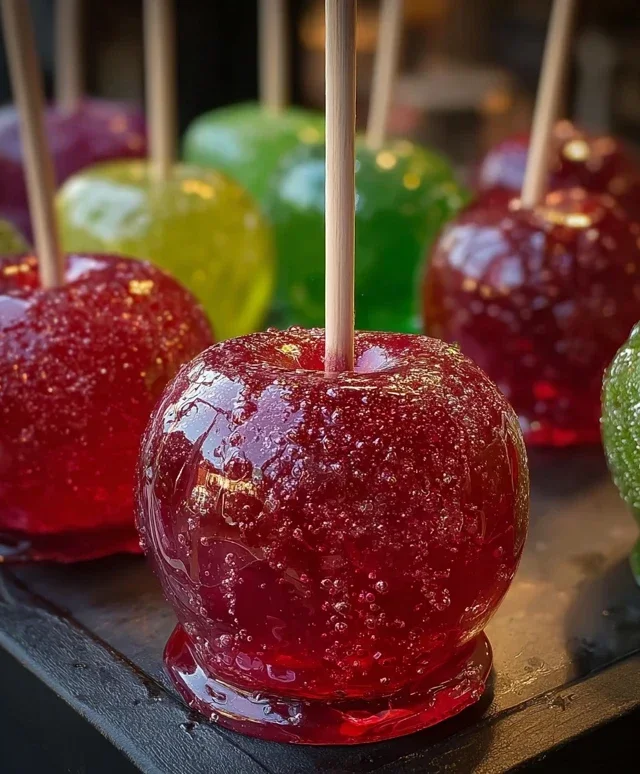
This is where the magic truly happens! Take your Jolly Rancher candies and place them in a sturdy plastic bag. Using a rolling pin or the bottom of a heavy pan, carefully crush the candies into smaller pieces. You don’t need to make them into a fine powder; a mix of smaller and slightly larger pieces will create a beautiful, textured candy shell. The goal is to break them down enough so they melt evenly. You can use a single color for a dramatic effect, or mix and match flavors for a knon-alcoholic aleidoscope of taste and color. For example, using all blue raspberry candies will create a stunning sapphire coating, while a mix of green apple, cherry, and blue raspberry will result in a dazzling, multi-colored masterpiece.
Melting the Candy
In a small, heavy-bottomed saucepan, combine your crushed Jolly Ranchers with 1-2 tablespoons of water. The water is essential for helping the candies melt evenly and preventing them from scorching. Place the saucepan over medium-low heat. Stir the candies constantly with a heatproof spatula or wooden spoon. It’s important to keep stirring to ensure even melting and to prevent any sugar crystals from forming or the candy from burning. As the candies begin extract to melt, you’ll notice the colors blending and the mixture becoming a thick, syrupy liquid. Continue to stir until all the candies are completely melted and the mixture is smooth and glossy. Be patient; this can take a few minutes. Avoid the temptation to turn up the heat, as overheated candy can become bitter.
Coating the Apples
Once your Jolly Rancher syrup is smooth and hot, it’s time to dip! Working quickly but carefully, tilt the saucepan and swirl each apple, using the skewer as a handle, to coat it evenly with the melted candy. Aim for a thin, even layer. You can dip the apple completely or just halfway for a more artistic look. If the candy starts to thicken too much as you work, you can gently reheat the saucepan over very low heat for a minute or two, stirring constantly. Be extremely cautious, as hot candy can cause severe burns. If you’re coating multiple apples, it’s a good idea to have your prepared apples and toppings set up beforehand so you can work efficiently.
Cooling and Decorating
After dipping your apples, carefully lift them out of the candy mixture and let any excess drip back into the saucepan. Then, place the coated apples upright on a piece of parchment paper or a silicone baking mat. This is the crucial cooling stage. Let the candy shell harden completely. This can take about 15-20 minutes at room temperature. While the candy is still slightly warm and tacky, but not fully set, is the perfect time to add your decorations. Sprinkle them generously with colorful sprinkles and edible glitter for an extra touch of sparkle and texture. You can also use melted chocolate to drizzle decorative patterns over the hardened candy shell once it’s completely set. Get creative with your designs!
Serving Your Masterpieces
Once your Jolly Rancher Candy Apples have cooled and the candy shell is completely hardened, they are ready to be enjoyed! The result is a beautifully vibrant, incredibly flavorful treat with a satisfyingly brittle shell. These candy apples are best enjoyed within a day or two of making them for the freshest, crispiest candy coating. Store them at room temperature, uncovered, to prevent the candy from becoming sticky. When you bite into one of these, you’ll experience an amazing crunch followed by the intense fruity burst of the Jolly Ranchers, all complemented by the crispness of the apple. They’re a showstopper for any occasion and a guaranteed hit with kids and adults alike. Enjoy the sweet success!
Conclusion:
So there you have it – a step-by-step guide to creating your very own, show-stopping Jolly Rancher Candy Apples! This recipe is truly fantastic because it transforms a classic treat into a vibrant, flavor-packed explosion. The crunch of the perfectly caramelized shell, infused with the intense, fruity goodness of Jolly Ranchers, makes for an unforgettable experience that’s both nostalgic and excitingly new. They’re perfect for parties, bake snon-alcoholic ales, or just a fun afternoon activity with family. Imagin extracte these colorful delights as the centerpiece of a dessert table, or individually wrapped for charming party favors that guests will rave about. Don’t be afraid to get creative with your flavors – try mixing different Jolly Rancher colors and tastes to create unique combinations!
I truly hope you’ll give this Jolly Rancher Candy Apples recipe a try. It’s incredibly rewarding to see these glossy, jewel-toned apples come to life. The joy on people’s faces when they bite into that sweet, crunchy shell is priceless!
Frequently Asked Questions:
Why are my candy apples not hardening?
Several factors can contribute to candy apples not hardening properly. Ensure your sugar syrup reached the hard-crack stage (around 300-310°F or 150-155°C) on a candy thermometer. If the temperature isn’t high enough, the syrup won’t crystallize correctly. Also, ambient humidity can play a role; it’s best to make candy apples on a dry day. Make sure your apples are completely dry before dipping, as water can prevent the candy from setting.
Can I use other types of candy instead of Jolly Ranchers?
Absolutely! While Jolly Ranchers give these candy apples their signature vibrant color and intense fruity flavor, you can experiment with other hard candies. Consider using Starbursts (unwrapped and melted) for a chewier texture, or even different brands of hard fruit candies. Just be mindful of the melting point and consistency of the candy you choose.
How should I store leftover candy apples?
Candy apples are best enjoyed fresh, but if you have leftovers, it’s important to store them properly to maintain their crunch. Wrap each apple individually in plastic wrap or place them in an airtight container at room temperature. Avoid refrigerating them, as the moisture can make the candy coating sticky and soft. They should be good for a day or two when stored correctly.
Jolly Rancher Candy Apples
A vibrant and sweet treat featuring crisp apples coated in melted Jolly Rancher candy, adorned with colorful sprinkles and edible glitter.
Ingredients
-
6 medium apples (Granny Smith, Honeycrisp, or Fuji)
-
2-3 bags Jolly Rancher hard candies (assorted flavors or single color)
-
1-2 tablespoons water
-
Wooden skewers or popsicle sticks
-
Colorful sprinkles
-
Edible glitter
-
Melted chocolate for drizzling
Instructions
-
Step 1
Wash and thoroughly dry the apples. Insert a wooden skewer or popsicle stick firmly into the stem end of each apple. -
Step 2
Unwrap the Jolly Rancher candies and place them in a heat-safe bowl. Add 1-2 tablespoons of water. -
Step 3
Melt the Jolly Ranchers in the microwave in 30-second intervals, stirring between each, until fully melted and smooth. Alternatively, melt in a double boiler. -
Step 4
Carefully tilt the bowl and dip each apple into the melted Jolly Rancher mixture, swirling to coat evenly. Allow excess candy to drip back into the bowl. -
Step 5
Place the coated apples on parchment paper or a silicone mat. Immediately sprinkle with colorful sprinkles and edible glitter before the candy hardens. -
Step 6
Once the Jolly Rancher coating is firm, drizzle with melted chocolate as desired. -
Step 7
Allow the candy apples to set completely before serving. Store at room temperature.
Important Information
Nutrition Facts (Per Serving)
It is important to consider this information as approximate and not to use it as definitive health advice.
Allergy Information
Please check ingredients for potential allergens and consult a health professional if in doubt.