Mini Rainbow Vanilla Bean Donuts-Delightful Bites
Mini rainbow vanilla bean donuts are an absolute delight, and I’m so excited to share this recipe with you! There’s something inherently joyful about a miniature treat, and when you add a vibrant splash of rainbow colors to a classic, fluffy vanilla bean donut, you’ve got a recipe for pure happiness. These aren’t just any donuts; they’re tiny bursts of sunshine, perfect for brightening any day. People adore these mini rainbow vanilla bean donuts because they evoke a sense of childlike wonder and celebratory fun. The delicate, fragrant vanilla bean speckling the tender crum extractb is truly what elevates them from good to absolutely divine. Whether you’re hosting a party, looking for a special weekend baking project, or simply craving a sweet escape, these little gems are sure to be a hit. Get ready to bake up a batch of pure bliss!
Mini Rainbow Vanilla Bean Donuts
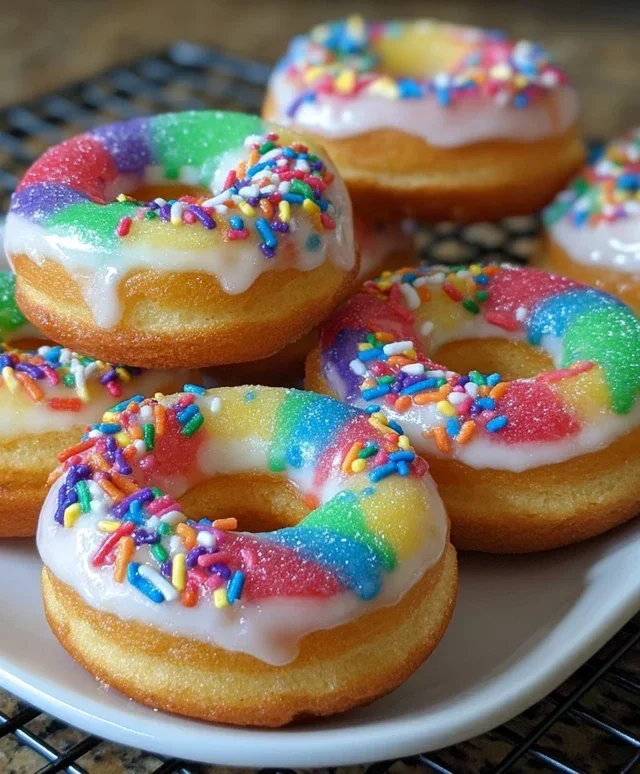
These Mini Rainbow Vanilla Bean Donuts are like little bites of pure joy! They’re incredibly fun to make, especially with kids, and the final result is a dazzling display of color and delicious vanilla flavor. The secret to their amazing taste and tender crum extractb is the real vanilla bean seeds, which give them an extra special aroma and subtle speckles of flavor throughout. Perfect for parties, special occasions, or just a delightful weekend treat, these mini donuts are sure to be a hit. We’ll be making them from scratch, starting with a simple cake donut batter and then transforming them into a vibrant rainbow of deliciousness.
Ingredients:
Donut Batter Creation
First things first, let’s get our donut batter ready. In a large mixing bowl, whisk together the sifted all-purpose flour, granulated sugar, baking powder, and salt. This dry mixture forms the base of our tender donuts. Make sure the baking powder and salt are evenly distributed to ensure a consistent rise and flavor.
In a separate medium bowl, whisk together the buttermilk, lightly beaten eggs, melted butter, and 1 teaspoon of vanilla extract. Now for the star of the show: scrape the seeds from your vanilla bean directly into this wet mixture. You’ll notice the tiny, fragrant specks – these are what will give our donuts that incredible, authentic vanilla flavor. Whisk everything together until well combined.
Now, we’ll gradually add the wet ingredients to the dry ingredients. Create a well in the center of your dry ingredients and pour in about half of the wet mixture. Gently stir until just combined. Then, add the remaining wet ingredients and stir until you have a smooth, thick batter. Be careful not to overmix, as this can lead to tough donuts. A few small lumps are perfectly fine.
Coloring the Rainbow
This is where the magic really happens! Divide your donut batter evenly into six small bowls. The number of bowls should correspond to the number of colors you want in your rainbow (we’re aiming for six!). Now, add a few drops of gel food coloring to each bowl. Start with a little and add more until you achieve your desired vibrant hues: red, orange, yellow, green, blue, and purple. Gel food coloring is best because it’s concentrated and won’t significantly alter the batter’s consistency. Stir each bowl gently until the color is fully incorporated.
Baking the Mini Donuts
Preheat your oven to 350°F (175°C). Lightly grease or spray your mini donut pans. This is crucial to prevent the donuts from sticking.
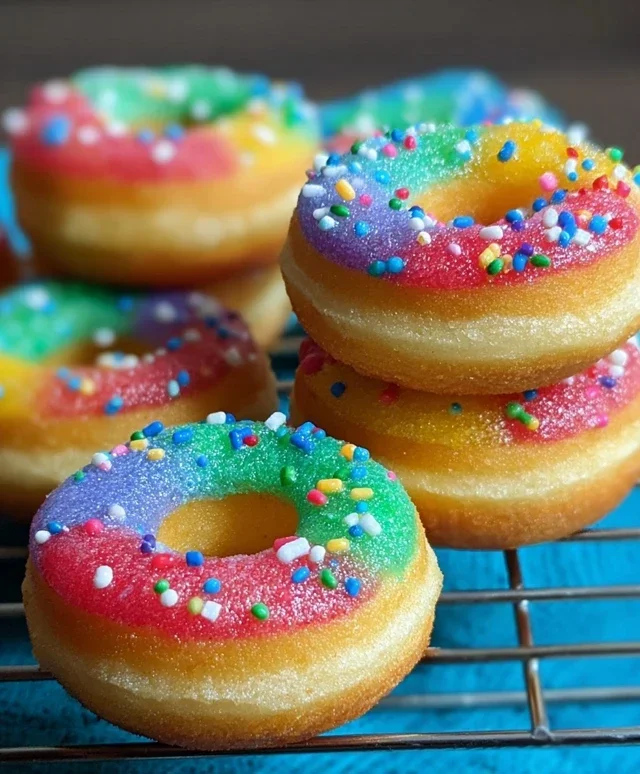
Now, carefully spoon each colored batter into a separate piping bag or a resealable plastic bag with a corner snipped off. This makes it much easier to fill the donut cavities neatly. Pipe each color into the donut molds, filling them about two-thirds of the way full. You can alternate colors within each donut mold for a swirled effect, or fill each mold with a single color to create distinct rainbow rings. I like to layer the colors in a rainbow order (red on the bottom, then orange, yellow, green, blue, and purple on top) for a beautiful layered look.
Bake for 8-10 minutes, or until a toothpick inserted into the center comes out clean. The baking time will depend on your oven and the size of your donut pans, so keep a close eye on them. Overbaked donuts can become dry, so aim for just cooked through. Let the donuts cool in the pans for a couple of minutes before carefully inverting them onto a wire rack to cool completely.
Crafting the Vanilla Bean Glaze
While your donuts are cooling, let’s prepare our delicious vanilla bean glaze. In a medium bowl, whisk together the sifted confectioners’ sugar and 1 tablespoon of whole milk or heavy cream. Add the ½ teaspoon of vanilla extract. Stir until you have a smooth, thick glaze. If the glaze is too thick, add a tiny bit more milk or cream, a teaspoon at a time, until you reach your desired drizzling consistency. If it’s too thin, add a little more sifted confectioners’ sugar. For an extra pop of color, you can add a drop or two of food coloring to the glaze, if desired. You can even divide the glaze and color it to match your donut colors!
Glazing and Decorating
Once the donuts are completely cool, it’s time for the fun part – glazing! You can dip the tops of the donuts into the glaze or use a spoon to drizzle it over them. For a more uniform coating, dip the tops of each donut into the glaze. If you’ve colored your glaze, you can alternate colors for a fun effect.
Immediately after glazing, while the glaze is still wet, sprinkle them generously with rainbow sprinkles, if using. This adds a festive sparkle and extra texture. If you want a marbled effect, you can gently swirl different colored glazes together before sprinkling.
Let the glaze set for about 15-20 minutes before serving. These Mini Rainbow Vanilla Bean Donuts are best enjoyed the day they are made, but they can be stored in an airtight container at room temperature for up to two days. Enjoy these delightful, colorful, and wonderfully flavored mini donuts!
Conclusion:
I hope you’ve enjoyed learning how to make these delightful Mini Rainbow Vanilla Bean Donuts! These little treats are truly a showstopper, combining the classic comfort of vanilla bean flavor with a vibrant pop of color. They’re incredibly versatile, making them perfect for any occasion, from a cheerful breakfast treat to a fun addition to a birthday party or a bake snon-alcoholic ale. The tender, cake-like texture and the sweet, delicate vanilla bean aroma are sure to impress everyone who tries them. Don’t be intimidated by the rainbow colors – they’re easier to achieve than you might think and add such a joyous element to these mini donuts.
For serving, I love to present them on a tiered stand or in colorful paper cups. They’re also fantastic on their own, but feel free to experiment! Consider adding a simple glaze, a dusting of powdered sugar, or even a sprinkle of edible glitter for extra sparkle. For variations, you could infuse the vanilla bean with a touch of lavender or lemon zest for a more complex flavor profile. The possibilities are endless! So please, give these Mini Rainbow Vanilla Bean Donuts a try. I’m confident you’ll find them as rewarding to make as they are delicious to eat. Happy baking!
Frequently Asked Questions:
Can I make these donuts without food coloring?
Absolutely! While the rainbow effect is a key feature of this recipe, the donuts will still be delicious with just the vanilla bean flavor. If you prefer to avoid artificial coloring, you can omit it entirely, or try using natural food colorings derived from fruits and vegetables, though the colors might be less vibrant.
How should I store leftover donuts?
To keep your Mini Rainbow Vanilla Bean Donuts fresh, store them in an airtight container at room temperature for up to 2-3 days. If your climate is particularly warm, you might consider refrigerating them, but be aware that refrigeration can sometimes affect the texture, making them a bit firmer.
Mini Rainbow Vanilla Bean Donuts
Delightful mini donuts infused with real vanilla bean and vibrantly colored for a festive treat. Perfect for parties and a fun baking project.
Ingredients
-
2 cups all-purpose flour, sifted
-
¾ cup granulated sugar
-
2 teaspoons baking powder
-
½ teaspoon salt
-
¾ cup buttermilk
-
2 large eggs, lightly beaten
-
2 tablespoons butter, melted
-
1 teaspoon vanilla extract
-
Seeds from 1 vanilla bean
-
Gel food coloring (red, orange, yellow, green, blue, purple)
-
1 cup confectioners’ sugar, sifted
-
1 tablespoon whole milk or heavy cream
-
½ teaspoon vanilla extract
-
Food coloring (optional)
-
Rainbow sprinkles (optional)
Instructions
-
Step 1
Preheat your oven to 350°F (175°C). Grease and flour mini donut pans or spray with non-stick cooking spray. -
Step 2
In a large bowl, whisk together the sifted flour, granulated sugar, baking powder, and salt. -
Step 3
In a separate bowl, whisk together the buttermilk, lightly beaten eggs, melted butter, 1 teaspoon vanilla extract, and vanilla bean seeds. -
Step 4
Pour the wet ingredients into the dry ingredients and mix until just combined. Do not overmix. -
Step 5
Divide the batter evenly among 6 small bowls. Add a different color of gel food coloring to each bowl and gently stir until the color is incorporated. Leave one bowl plain if desired for a lighter rainbow effect. -
Step 6
Spoon or pipe the colored batters into the prepared mini donut pans, alternating colors for a marbled or layered effect. Do not overfill. -
Step 7
Bake for 10-12 minutes, or until a toothpick inserted into the center of a donut comes out clean. -
Step 8
Let the donuts cool in the pans for a few minutes before transferring them to a wire rack to cool completely. -
Step 9
While the donuts cool, prepare the glaze: In a medium bowl, whisk together the sifted confectioners’ sugar, 1 tablespoon of milk or cream, and ½ teaspoon vanilla extract until smooth. Add more milk or cream, a teaspoon at a time, to reach your desired drizzling consistency. Add optional food coloring if desired. -
Step 10
Dip or drizzle the cooled donuts with the glaze. Immediately add rainbow sprinkles, if using, before the glaze sets.
Important Information
Nutrition Facts (Per Serving)
It is important to consider this information as approximate and not to use it as definitive health advice.
Allergy Information
Please check ingredients for potential allergens and consult a health professional if in doubt.